In today’s digital age, cloud storage is essential for both personal and business use. Finding the least expensive cloud storage can save money while ensuring data is secure and accessible.
Cloud storage services offer a range of pricing models and features. It’s crucial to understand these options to choose the best value for your needs. This guide will help you explore the most budget-friendly cloud storage solutions available. We’ll dive into various pricing models, potential hidden fees, and the top providers that offer excellent services at low costs.
Whether for personal use or business requirements, this introduction will set the stage for finding the most affordable and efficient cloud storage options. Let’s embark on this journey to make smarter, cost-effective storage choices.
Credit: gizmodo.com
Table of Contents
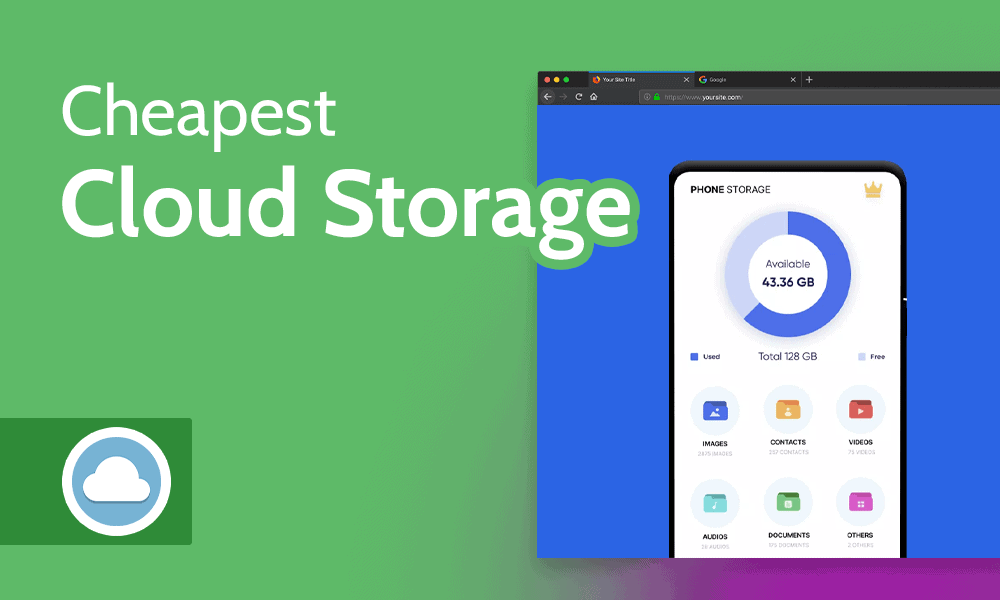
Least Expensive Cloud Storage: Get The Best Value
Finding the best value in cloud storage can be a challenge. Many services promise low prices, but hidden fees often increase costs. To get the least expensive cloud storage, it is important to compare plans. Look for services that offer flexible options.
Some companies provide pay-as-you-go plans. This can help you avoid paying for storage you do not use. Also, check if they offer free trials. Trying a service before committing can save money. Don’t forget to read reviews. Other users’ experiences can guide you.
Lastly, ensure the service has good security. Storing data cheaply is only worth it if your data stays safe.
Understanding Cloud Storage Pricing Models
Cloud storage pricing models can be complex. Different providers offer various pricing plans. Some charge by the amount of storage space used. Others have a flat monthly fee. Pay-as-you-go models are also common. This means you only pay for what you use.
Free tiers may be available with limited storage space. Additional costs can arise for data transfers or extra features. Understanding these details can help you find the most affordable option. Comparing different providers is key. Look at their pricing structures carefully.
Consider your storage needs and budget. This way, you can choose the best plan for you.
Pay-as-you-go Vs. Fixed Plans
Selecting between pay-as-you-go and fixed plans for cloud storage can be tricky. Pay-as-you-go plans charge based on how much storage you use. This option is flexible. If you use less storage, you pay less. It is great for users with changing storage needs.
Fixed plans, on the other hand, offer a set amount of storage for a fixed price. This can be a good choice for users who know exactly how much storage they need. Fixed plans can help you budget better because the cost is always the same.
Both options have their benefits, and choosing the right one depends on your specific needs.
Storage Tiers And Their Cost Impact
Cloud storage services often come with different pricing options. These are called storage tiers. Each tier varies in cost depending on the service provided. Basic storage tiers usually offer less space and fewer features. They are the cheapest option. Mid-level tiers provide more storage and extra features.
They cost a bit more. High-end tiers come with the most storage and advanced features. These are the most expensive. Choosing the right tier depends on your needs and budget. For those with minimal storage needs, the basic tier is a good choice.
For more storage and features, consider the mid-level tier. High-end tiers suit users with large storage requirements and the need for advanced features.
Hidden Fees To Watch For
Many cloud storage services advertise low prices, but hidden fees can quickly add up. Storage plans often come with extra charges for exceeding data limits. Some providers may also bill for additional users or devices connected to the account. Data transfer fees can surprise users when moving large files.
Another common fee is for accessing data frequently, which can be costly for businesses needing constant data retrieval. It’s important to read the fine print in pricing plans to avoid unexpected costs. Understanding these hidden fees can help in choosing the most affordable cloud storage service without breaking the budget.
Top Budget-friendly Cloud Storage Providers Today
For those on a budget, finding affordable cloud storage can be challenging. Google Drive offers a generous 15GB of free storage. This is a great starting point for many users. Another good option is Dropbox, which provides 2GB of free storage with easy sharing options.
For those needing more space, pCloud offers a lifetime plan, saving money in the long run. It gives 10GB of free storage initially. Microsoft OneDrive is another strong contender, offering 5GB for free and seamless integration with Office apps. Each of these providers balances cost and features, making cloud storage accessible without breaking the bank.
Finding The Least Expensive Cloud Storage Options
Finding affordable cloud storage options can help save money without sacrificing quality. Many services offer competitive pricing for storing files securely online. Google Drive provides a free plan with 15 GB of space, suitable for basic needs. Upgrading to 100 GB costs just a few dollars per month.
Microsoft OneDrive offers 5 GB free, with 100 GB plans available at a reasonable price. Dropbox gives users 2 GB for free, with affordable options for more space. Other services like pCloud and iDrive also have budget-friendly plans. Comparing these options helps find the best fit for your storage needs.
Personal Storage Solutions
Finding the right personal storage solution at a low cost can be a challenge. Many people need a place to store photos, documents, and other files. Cloud storage provides an affordable and convenient option. Services like Google Drive, Dropbox, and OneDrive offer free plans with limited storage.
These plans are perfect for individuals with small storage needs. Upgrading to a paid plan is an option if more space is required. Prices are generally low, making it easy to fit into a budget. The flexibility of accessing files from any device adds to the appeal.
Staying organized and keeping important data safe has never been easier.
Business Storage Solutions
Selecting the right storage solution for your business can be challenging. Many businesses need storage options that are cost-effective yet reliable. Cloud storage offers a viable solution for many companies. It provides flexibility and scalability without the need for physical hardware.
Companies can save money by only paying for the storage they actually use. This is beneficial for businesses with fluctuating storage needs. Security is also a key feature, with many providers offering robust protection measures. Automatic backups ensure data is safe and can be easily restored if needed.
Overall, cloud storage presents a practical and affordable option for businesses seeking efficient storage solutions.
Hybrid Storage Options
Hybrid storage options blend the advantages of both local and cloud storage. This approach allows users to store frequently accessed files on local servers, ensuring quick access. Less critical data can be stored in the cloud, saving costs and space.
For businesses with fluctuating storage needs, hybrid storage offers flexibility. It can easily scale up or down based on current demands. Also, hybrid solutions provide an extra layer of security. Sensitive data can remain on-premises while other data is safely stored off-site.
This combination helps in achieving a balance between cost-efficiency and performance.
Comparing Storage Capacities And Their Costs
Different cloud storage providers offer varying storage capacities and costs. Some services provide small amounts of free storage, while others charge for every gigabyte used. Choosing the right plan depends on your needs. For example, Google Drive offers 15GB for free, which suits many casual users.
On the other hand, Amazon S3 charges based on storage size and data transfer, making it ideal for larger needs. Dropbox offers flexible plans, starting with 2GB free and paid plans for more space. Microsoft OneDrive gives 5GB for free, with options to upgrade.
Each provider has its own pricing structure, so comparing them is key to finding the least expensive option that meets your storage requirements.
Essential Features That Add Value Without Cost
Many people seek affordable cloud storage options that still offer essential features. Storage solutions should include ample space for files and easy access from any device. Security is another important aspect, ensuring data remains safe and private. User-friendly interfaces help individuals manage their files without needing technical expertise.
Compatibility with various file types ensures that users can store documents, photos, and videos without issues. Reliable customer support is also a key feature, providing assistance whenever needed. These elements make a cloud storage service valuable without adding extra costs.
File Sharing Capabilities
Affordable cloud storage options often come with robust file sharing capabilities. Users can easily share large files with friends, family, or colleagues. These services usually include features like link sharing, which allows you to send a file to someone without them needing an account.
Some platforms even offer password protection for added security. Access permissions can be customized, letting you decide who can view, edit, or download the files. These functionalities make collaboration straightforward and efficient. Most services also support multiple file types, ensuring compatibility with various formats.
Overall, the convenience of sharing files without high costs makes these cloud storage solutions appealing.
Collaboration Tools
Cloud storage offers many tools for working together. Teams can edit documents at the same time. This means less email and faster work. Changes are saved automatically. Everyone sees the latest version. Some tools let you chat while you work.
This helps solve problems quickly. You can also share files with a link. No need to worry about file size. Cloud storage keeps your files safe. Access them from anywhere, anytime. It makes teamwork simple and smooth.
Mobile Access Options
Accessing cloud storage on mobile devices offers great convenience. It’s possible to view and share files no matter where you are. Many cloud storage services provide user-friendly apps for iOS and Android. These apps allow users to upload, download, and sync files easily.
Notifications help keep you updated on any changes to your documents. Security features ensure your data remains safe, even when using a public network. Some services also offer offline access, enabling you to work without an internet connection. Overall, mobile access to cloud storage makes file management simple and efficient.
Security Measures In Budget Cloud Storage
Security is a major concern in budget cloud storage. Affordable services often use encryption to protect data. This means your files are coded so only you can read them. They also use strong passwords and two-factor authentication. This adds an extra layer of security.
Some services have regular security updates. This helps keep your data safe from new threats. Many budget options have data backup features. In case of a problem, you can restore your files. Even on a budget, cloud storage can offer good security.
Just make sure to choose a reliable provider. This way, your data stays safe without spending too much.
How To Maximize Storage Space On A Budget
Finding the best value in cloud storage can be tricky, but it’s possible to maximize storage space on a budget. Start by exploring free storage options from popular providers like Google Drive, Dropbox, and OneDrive. Many offer a few gigabytes of space at no cost.
Also, consider using multiple accounts to increase your storage capacity without paying extra. Compressing files can save space, allowing you to store more data. Deleting unnecessary files and regularly organizing your storage can make a big difference. Finally, keep an eye out for promotions and discounts from cloud storage providers to get the best deals.
File Compression Techniques
File compression techniques can greatly reduce storage costs. By compressing files, less space is needed, making cloud storage more affordable. There are many methods to compress files. Zip and RAR are common options that shrink file sizes. These formats are easy to use and work on most devices.
Another technique is using lossless compression. This method reduces file size without losing data. It’s ideal for important documents and images. Lossy compression is also popular. It reduces file size by removing some data. This method is best for media files where some quality loss is acceptable.
Effective compression can lead to significant savings in cloud storage costs.
Smart Organization Methods
Efficient organization of your cloud storage can save both time and money. Start by categorizing files into specific folders based on their type or purpose. This makes it easy to find what you need quickly. Use clear, simple names for folders and files to avoid confusion.
Regularly clean up and delete unnecessary files to free up space. Take advantage of built-in search features offered by cloud storage services to locate files faster. Consider setting up automatic backups to ensure important data is always safe. Share folders with specific people to collaborate without cluttering your storage.
These methods help keep your cloud storage organized and cost-effective.
Storage Management Tips
Effective storage management can make cloud storage more affordable. Start by regularly reviewing and deleting unnecessary files to free up space. Organizing your data into clear, labeled folders helps you find and manage files easily. Consider compressing large files to save space.
Opt for cloud storage providers that offer tiered pricing, so you only pay for the storage you use. Use automatic sync and backup features to keep your data up-to-date without manual effort. Periodically checking for duplicate files can also prevent wasted storage.
Adopting these simple practices ensures you make the most of your cloud storage without overspending.
Free Vs. Paid Cloud Storage: What’s Worth Paying For
Exploring the world of cloud storage often leads to a choice between free and paid options. Free cloud storage offers a set amount of space without cost, which can be great for personal use or small files. On the other hand, paid cloud storage plans provide larger space and extra features.
These features might include better security, more control over file versions, and advanced sharing options. Many users find that paying for storage is worth it for these added benefits. By investing in a paid plan, you can ensure your data is safer and more accessible.
Long-term Cost Analysis Of Popular Providers
Choosing the right cloud storage can save money in the long run. Google Drive offers 15GB of free storage. Extra storage starts at $1. 99 per month for 100GB. Dropbox gives 2GB free. Their Plus plan, with 2TB, costs $9.
99 a month. OneDrive provides 5GB free. You get 100GB for $1. 99 a month. Amazon Drive gives 5GB free. They charge $1. 99 per month for 100GB. ICloud offers 5GB free. Their 50GB plan costs $0. 99 a month.
Examining these options shows that smaller storage needs can be met for little to no cost. For larger needs, Google Drive and OneDrive are cost-effective.
Annual Vs. Monthly Billing Comparison
Choosing between annual and monthly billing for cloud storage depends on your usage needs and budget. Annual billing often provides a discount, making it cheaper in the long run. Monthly billing, on the other hand, offers flexibility. You can cancel or change plans as needed without a long-term commitment.
This might be a better choice for those uncertain about their long-term storage needs. Evaluating these options helps in making an informed decision. Savings can be significant with annual plans, but monthly plans offer the advantage of spreading out costs over time.
Balancing cost and commitment is key to finding the best fit for your cloud storage needs.
Storage Upgrade Costs
Choosing the right cloud storage can save you money. Many people worry about the cost of upgrading their storage. Some companies offer very affordable plans. These plans often give you more space without spending too much. For example, Google Drive has options that start at a low price.
Another option is Amazon S3, which is also budget-friendly. Comparing different providers can help find the best deal. Make sure to check the costs for extra features. Sometimes, you pay more for things like faster upload speeds or extra security.
Always read the details before making a choice.
Data Transfer Fees
Data transfer fees can add up quickly when using cloud storage. Every time you move data to or from the cloud, it costs money. These costs depend on the cloud provider you choose. Some providers charge more for data transfers, which can make your cloud storage less affordable over time.
It’s important to check these fees before choosing a service. Many people forget to consider this extra cost. By comparing the data transfer fees of different providers, you can save a lot of money. Remember to look for hidden fees in the terms and conditions.
This way, you avoid any surprises on your bill.
Tips For Reducing Your Cloud Storage Expenses
Storing files in the cloud can be costly. To save money, first, clean up your storage. Delete files you no longer need. Next, compress your files. Smaller files take up less space. Also, consider sharing files through links instead of storing multiple copies.
Another tip is to use free storage options. Many cloud services offer some free space. Compare different plans and choose the one that fits your needs best. Remember to regularly review your storage usage. This helps you avoid paying for more space than you need.
Lastly, look for promotions or discounts. Sometimes, cloud services offer deals to new users.
Conclusion: Making The Smart Choice In Cloud Storage
Choosing the right cloud storage can be a daunting task, but it doesn’t have to be. The key is to look for affordable options that fit your needs. Many providers offer good deals with basic features at low prices. Compare the storage space, security, and ease of use.
Look at user reviews to see what others are saying. Free trials are a good way to test the service without spending money. Keep in mind the importance of backup and access to your files from any device. This helps in making a smart choice for your cloud storage needs.
Credit: www.cloudwards.net
Frequently Asked Questions
What Is The Cheapest Cloud Storage Option?
Many providers offer affordable plans, but Google Drive, Dropbox, and OneDrive are popular for low-cost options. Each has different features and pricing models.
How Do Cloud Storage Pricing Models Work?
Cloud storage pricing varies by provider. Common models include pay-as-you-go, fixed plans, and tiered storage. Understand your needs to choose wisely.
What Are Storage Tiers?
Storage tiers categorize data by access frequency. Hot storage is for frequent access, cold storage for infrequent access, and archive for long-term storage. Costs vary by tier.
Are There Hidden Fees In Cloud Storage?
Some providers may charge for data transfers, API requests, or retrievals. Always read the fine print to avoid unexpected costs.
Conclusion
Finding the least expensive cloud storage requires understanding your needs and options. Compare different providers and plans. Look for hidden fees and consider pay-as-you-go models. Opt for essential features that offer great value. Smart file management can also save costs.
Evaluate your long-term needs and choose accordingly. Remember, affordable cloud storage can still be secure and efficient. Choose wisely to get the best value for your money.
The recent Ace Hardware cyber attack shows that big retailers can get hacked too. With 1,400 servers and 3,500 devices, the breach hit 1,202 devices. This made online orders stop and transactions fail.
Because of this, Ace Hardware had to stop all operations on November 3, 2023. They did this to figure out and fix the problem. This shows how important it is to protect data from cyber attacks, which often start with phishing.
If we take lesson from ace hardware cyber attack, businesses entity can learn to better protect themselves. They can make their cybersecurity stronger. This helps keep customers safe and keeps the business running smoothly.
Key Takeaways
Cyber attacks can disrupt even established retailers like Ace Hardware.
Robust data protection measures are essential to protect customer information.
Phishing incidents are the root cause of 58% of retail cyber attacks.
Ongoing vigilance is crucial to mitigate risks from evolving cyber threats.
Immediate response can help limit the extent of a security breach.
Table of Contents
Overview of the Ace Hardware Cyber Attack
On October 29, 2023, a big cyber attack hit Ace Hardware. It targeted their IT systems. This attack caused big problems, affecting 1,202 servers and 3,500 devices.
Important systems like ACENET and Warehouse Management Systems were hit. This showed big weaknesses in Ace Hardware’s online world.
The attack had big effects. Ace Hardware had to stop online services and freeze transactions. But, the point-of-sale systems were safe, so stores could still work.
By early Thursday, half of the servers were back up. They focused on 196 servers for getting, picking, and shipping. But, there were worries about phishing attacks trying to get into accounts.
This attack shows cyber threats are getting worse. It’s important for businesses to protect themselves. They need to stay ready for new threats.
Impact of Cyber Attacks on Businesses
The recent cyber attack on Ace Hardware shows how big the problem is. It affects many things important for a business to keep going. It also hurts the trust customers have in the company.
For example, about 196 servers and over 1,000 network devices were hit. Now, 51% of the servers are back up. But, this shows how hard it is to fix things after an attack.
Also, the attack made it hard for customers to order online. This makes people unhappy and hurts the company’s money. It also means the company has to deal with more problems, like phishing attacks.
Businesses need to stay careful to avoid more problems. Hackers often try to take advantage of the mess after an attack. They send fake emails asking for money or personal info.
Companies must focus on keeping their systems safe. They need strong security, like zero-trust architecture, and training for employees. The Ace Hardware attack shows how important it is to protect against cyber threats.
Ace Hardware Cyber Attack: Details and Timeline
The ace hardware hacking incident has raised concerns about retail sector cybersecurity. Understanding the details and timeline of this event is crucial. It shows how cyber attacks can hit even big companies.
Below, I outline the events of this cyber attack on Ace Hardware. I also cover the initial responses to the breach.
Chronology of Events
Sunday Morning: Operations halted as signs of the ace hardware security breach emerged.
Investigation Triggered: The company found that about 1,202 servers and devices were hacked.
Assessment Initiated: IT experts and forensic specialists were quickly called in to check the breach’s impact.
Restoration Efforts: 196 servers were fixed to keep order processing going.
Progress Report: As the investigation went on, 51% of hacked servers were fixed. They were being checked by Ace’s IT team.
Initial Response and Mobilization
The ace hardware security breach details showed the need for quick action against cyber threats. IT specialists were quickly brought in to assess the damage. This was key for starting recovery efforts.
This team worked fast to reduce disruptions and deal with the hack’s aftermath. They warned staff about phishing scams, showing the wide range of risks. This shows how important it is for companies to stay alert and ready for cyber threats.
Cybersecurity Threats in Retail
The retail industry is a big target for cybercriminals. Retailers like Ace Hardware must protect customer data. Malware attacks show the need for better security.
Weak security and unaware employees are big problems. These issues let cybercriminals cause big trouble. For example, malware can hurt operations and cost a lot of money.
Businesses need a strong plan to fight these threats. This includes new security tools, regular checks, and training employees. This way, they can stop malware and keep their reputation safe.
Cybersecurity Threats
Impact on Retail
Mitigation Strategies
Data Breaches
Loss of customer trust and financial penalties
Employ strong encryption and access controls
Malware Attacks
Operational disruptions and revenue decline
Regular software updates and employee training
Phishing Schemes
Exposure to unauthorized access and fraud
Implement multi-factor authentication
Ransomware
Severe operational halt and ransom payments
Conduct regular backups and updates
A good cybersecurity plan helps retailers stay safe. It lets them grow without worrying about threats. It’s key for any business to succeed online today.
Lessons Learned from the Ace Hardware Incident
The Ace Hardware cyber incident teaches us a lot about cybersecurity. It shows how fast we need to act when something goes wrong. The breach started on October 27, 2023, but Ace Hardware took too long to respond.
This slow response led to a lawsuit and claims of neglect. If they had acted quickly, they could have lessened the damage. This would have also cut down on the time they were offline.
Importance of Rapid Response
In today’s world, we must respond fast to cyber threats. The delay in telling people and authorities about the breach made things worse. It put more people at risk of identity theft and fraud.
This shows how slow action can hurt a company’s image and people’s safety. Being ready to act fast is key to keeping information safe.
Need for Ongoing Vigilance
Keeping watch is always important in cybersecurity. The breach hit almost 7,300 people, showing big companies can get hacked too. We must stay alert as threats get smarter.
The Ace Hardware case shows we need to keep training our employees. They need to know how to spot and stop threats like phishing.
Lesson
Description
Rapid Response
Immediate actions can minimize damage and protect sensitive information.
Ongoing Vigilance
Continuous monitoring is required to counter evolving cyber threats.
Employee Training
Regular training helps staff identify and respond to suspicious activities.
Clear Communication
Timely and transparent notifications to affected parties are crucial.
Strategies for Cyber Attack Prevention
Protecting retail operations from cyber attacks is key. A good plan can lower risks and boost security. Regular checks of security systems are important. They help find and fix weak spots before they get worse.
Improving firewalls is also crucial. New firewall tech can strengthen business defenses against threats. Watching the network in real-time helps catch and stop attacks fast.
Teaching employees about data safety is vital. They need to know how to spot and report threats. This makes them a strong defense against cyber attacks.
Putting these steps into daily work is key to staying safe. A culture of security awareness helps a lot. Here are some main strategies:
Do regular security checks to find weak spots.
Use advanced firewalls to keep out unwanted access.
Watch the network all the time to catch threats fast.
Teach employees to spot and report cyber threats.
Have a plan ready for when an attack happens.
By taking these steps, retailers can build a strong defense. The right mix of tech and training is key. It keeps businesses safe and strong in our digital world.
Prevention Strategy
Description
Benefits
Regular Security Audits
Checks current security and finds weak spots.
Finds and fixes problems before they get worse.
Firewalls
Uses advanced firewalls to block bad access.
Makes the business safer.
Real-time Monitoring
Always watches the network for threats.
Can stop attacks quickly.
Employee Training
Teaches staff about cyber safety.
Makes everyone more aware of security.
Incident Response Plan
Prepares for quick action in case of an attack.
Reduces damage and speeds up fixing.
Ace Hardware’s Recovery Measures
The journey of ace hardware recovery shows the hard work needed to get back after a breach. The company quickly acted when they found a cyber attack on most of their IT systems. They worked hard to fix the problem, affecting 1,202 devices, including 196 servers from 1,400.
Now, 51% of those servers are back up and running. This is a big step towards getting everything back to normal.
During this tough time, the company focused on checking systems to keep them safe. They also made sure to tell everyone what was happening. This helped build trust with customers, who were worried.
Fixing systems after a breach is not just about getting things working again. It’s also about keeping customers happy and confident. Ace Hardware worked hard to avoid losing market share and to keep products available.
Conclusion
The Ace Hardware cyber attack happened from October 27 to 29, 2023. It shows we all need to be ready for cyber threats. This attack hit many customers and showed us big weaknesses in our systems.
Looking back, we see that businesses must learn from such attacks. They need to make their security stronger for the future.
This article talked about how big these breaches can be. It showed how important it is to always improve our cybersecurity. Keeping customer data safe is key, especially when it’s been stolen.
Also, offering help like credit monitoring and identity protection is crucial. It helps those who have been hurt by these attacks.
In the end, staying alert is key in our digital world. Companies that keep checking their security and invest in strong defenses are safe. They also gain their customers’ trust. By learning from these attacks, companies can lower the risk of cyber threats.
FAQ
What happened during the Ace Hardware cyber attack?
The Ace Hardware cyber attack happened on October 29, 2023. It hit their IT systems hard, stopping operations worldwide. This made it hard for the company to serve customers online.
What were the consequences of the data breach at Ace Hardware?
The data breach at Ace Hardware caused big problems. It stopped both in-store and online sales. Customers got upset, and their personal info was at risk, hurting trust and sales.
What type of cybersecurity threats does the retail industry face?
Retailers face many cybersecurity threats. These include malware, phishing, and weak security due to lack of knowledge. They are targets because they have lots of customer data.
How did Ace Hardware respond to the cyber attack?
Ace Hardware quickly called in IT and forensic experts. They worked to understand the breach and start fixing it. They also kept everyone informed to regain trust.
What lessons can other businesses learn from the Ace Hardware incident?
The Ace Hardware incident teaches us to act fast and stay alert. Businesses should train employees to spot threats. They also need strong security to fight off attacks.
What strategies can retailers adopt to prevent cyber attacks?
Retailers can stop cyber attacks by doing regular security checks. They should also improve their firewalls and watch their networks closely. Teaching employees to spot threats helps a lot too.
How can retailers recover from a cyber attack?
To get over a cyber attack, retailers need to fix their systems and check them often. Keeping customers informed is key to winning back their trust.
As we know Affenhance helps to make content, to analyzing data, and to improve work flows. For this it is a common question: how does affenhance work? Riley Affenhance uses cool tech like AI and machine learning to make us more efficient. It’s easy to use, so even tech newbies can get the most out of it.
This tool automates boring tasks and gives smart tips. It also lets you customize it for your needs. The affenhance performance explanation shows how AI learns from us to make our experience better. Riley Affenhance makes hard tasks easy and saves us time.
Let’s explore what makes Affenhance so great. It’s a game-changer for anyone wanting to do more with less effort.
Key Takeaways
Riley Affenhance uses AI and machine learning to boost productivity and creativity.
The platform automates tasks, saving users time and effort.
It offers a user-friendly interface suitable for all proficiency levels.
Affenhance can be tailored for various industries including business, education, and healthcare.
It emphasizes continual improvement to adapt to future trends.
Riley Affenhance is known for its cost-effectiveness and reliability.
Table of Contents
Introduction to Affenhance
Affenhance is quickly becoming popular among tech fans and business people. It makes digital work better and faster. It’s a key tool for boosting productivity.
This software offers a smooth experience. It’s all about making digital work easier. My look into it showed me how useful it is in many areas.
The affenhance software overview shows its main features. They help make work easier and faster. The interface is easy to use, helping you manage your time better.
For those wanting to work smarter, Affenhance is a great choice. It helps you focus on the creative parts of your work.
Learning how to use affenhance well makes a big difference. Knowing all its features helps you use it to its fullest. It’s not just about doing tasks; it’s about changing how we use tech every day.
Understanding the Basics: What Is Riley Affenhance?
Riley Affenhance is a new way to make things better in many areas. It uses artificial intelligence and machine learning. This helps people get better results faster.
What is riley affenhance? It’s a tool for making things work better. It’s easy to use, even if you’re not tech-savvy. Riley Affenhance makes tasks easier by doing them for you, saving time.
This tool gets better with time, making it personal for each user. It works in many fields like managing projects, teaching, healthcare, and making content. Riley Affenhance makes work better and helps teams work together smoothly.
Key Features of Affenhance
A affenhance capabilities review shows its unique features. The interface is easy to use, welcoming all users. Its advanced AI offers smart suggestions to boost work and decision-making.
Affenhance stands out with its affenhance features and functionality. It makes managing tasks and teamwork better. Key features include:
Intuitive dashboard for real-time insights
Customizable templates to fit diverse project needs
Seamless integration with existing tools and applications
Robust analytics capabilities for tracking performance
The focus on affenhance optimization techniques shows its ability to learn and adapt. This helps users work more efficiently. It supports many workflows, fitting various industries and team setups.
Affenhance makes teamwork better by improving how team members interact. Its features are designed to increase productivity. This is why users love what Affenhance offers.
Feature
Description
Benefits
User-Friendly Interface
Simplifies navigation and operations for users.
Reduces learning curve and increases accessibility.
Advanced AI
Offers intelligent suggestions based on user behavior.
Enhances decision-making and productivity.
Real-Time Analytics
Provides insights into team performance and outcomes.
Improves accountability and goal tracking.
Customizable Templates
Adapts to various project requirements.
Saves time and effort in project setup.
Benefits of Using Affenhance
Using Affenhance brings many benefits for both personal and work life. It makes tasks simpler, helping you manage your work better. This tool is great at making things more efficient by automating tasks.
For gamers, Affenhance is a game-changer. It helps players level up faster. You can try out different builds and characters, like Barbarian or Sorceress.
But Affenhance is not just for gamers. Businesses use it too. It helps teams work better together. Everyone can share what they’ve learned, making everyone better at their job. Using Affenhance brings big advantages, making life and work better.
How Does Affenhance Work?
Affenhance uses advanced artificial intelligence to learn from users. It gets better with each interaction. This makes the user experience better over time.
Affenhance Mechanism of Action
The affenhance operation process uses a smart system. Every time a user interacts, it learns more. This makes the platform better at understanding what users want.
This learning cycle makes Affenhance unique for each user. It’s key to see how it works to understand its value.
Understanding Affenhance Functionality
Affenhance’s design is simple and easy to use. It learns quickly from what users say. This helps it give better suggestions and answers.
This makes Affenhance not only easy to use but also effective. It’s a great choice for those looking for a smooth experience.
Applications Across Various Industries
Affenhance is versatile and useful in many fields. Its technology and design help solve different problems. It’s great for business, education, and content creation.
Using Affenhance in Business
Businesses see the value of affenhance in digital marketing. It helps with managing projects and customer relationships. It makes work easier and more efficient.
It automates tasks so teams can focus on big ideas. Affenhance works for all kinds of businesses, big or small.
Implementing Affenhance in Education
In schools, affenhance changes how teachers teach. It helps make lessons better and track student progress. It also gives feedback that helps students improve.
Teachers get smart tips to help students who need extra help. This makes learning better for everyone.
Affenhance in Content Creation
Content makers love affenhance for making their work easier. It helps them work better together. This is true for writing, videos, or graphics.
It lets creators tailor the platform for their needs. This makes projects run smoothly.
Industry
Application
Benefits
Business
Project Management
Streamlines workflows and increases efficiency
Education
Student Engagement
Enhances lesson plans and tracks progress
Content Creation
Creative Collaboration
Optimizes workflows and fosters teamwork
Efficient Workflow with Affenhance
Using Affenhance changes how I do tasks every day. The affenhance workflow explained makes things smoother. It has tools for managing projects, analyzing data, and working with teams.
Learning how to use affenhance effectively is easy because it’s user-friendly. It brings together many functions and helps teams talk better. You can change it to fit your needs.
The affenhance marketing tools are really helpful. They let me see how well my marketing is doing. I can make quick decisions with the help of real-time data.
Feature
Description
Benefit
Project Management
Integrates task allocation and deadlines in one place.
Enhances team productivity and accountability.
Data Analysis
Provides insights through visualized data reporting.
Enables strategic decision-making.
Team Collaboration
Facilitates seamless communication channels.
Fosters a unified team environment.
Marketing Tools
Tracks and analyzes marketing campaign performance.
Optimizes marketing efforts based on real-time data.
Adding Affenhance to my daily tasks has been a big help. It makes me more efficient and productive. The insights I get help me organize better and finish projects faster.
Getting Started with Affenhance
Starting with Affenhance is exciting. It’s key to know how to use it well. Take time to learn about its features. This will help make your work easier.
Choosing the right subscription is important. Affenhance has plans for everyone. Pick one that fits your needs. This choice is crucial for using it well.
Then, set up your account. This step helps you get used to the platform. Follow the steps and explore the interface. This will make you feel more comfortable with the software.
Using guides and tutorials is also helpful. There are many resources to learn how to use affenhance effectively. These guides show you how to use the tools. They make sure you have a smooth experience.
Finally, start using Affenhance every day. The affenhance software overview shows how its features work together. With practice, you’ll see its full power.
Feature
Benefit
Flexible Subscription Plans
Choose a plan that fits your needs and budget.
User-Friendly Interface
Easy navigation increases productivity and reduces confusion.
Comprehensive Tutorials
Learn how to maximize usage through guided instruction.
In this article, I talked about the good things about using Affenhance. I explained how it works and what makes it special. This tool makes things more efficient and helps people in many fields.
It makes hard tasks easy and has a simple design. This makes it easy for anyone to use it to make their work better.
Affenhance is also very flexible. It can help with both small tasks and big goals. It’s easy to use and doesn’t cost a lot. This means you can get good results without needing to know a lot of technical stuff.
In short, knowing how to use Affenhance can really help you work better. As technology gets better, I think we should all try using Affenhance. It can help us do well in our work and keep up with new technology.
FAQ
How does Affenhance work?
Affenhance uses advanced AI and machine learning. It makes digital tasks easier and faster. This improves how we work and feel over time.
What are the key features of Affenhance?
Affenhance has a simple interface and smart task tools. It also offers easy team work and automates tasks. All these help us work better.
What are the benefits of using Affenhance?
Using Affenhance saves time and boosts productivity. It helps with routine tasks and team work. This leads to better project results.
How does Affenhance improve efficiency?
Affenhance makes work smoother by automating tasks. It also gives smart suggestions based on how we use it. This makes our work more focused and efficient.
What is the mechanism of action behind Affenhance?
Affenhance learns from how we use it. It gets better at helping us over time. This makes it more useful for our needs.
Can Affenhance be integrated across different industries?
Yes, Affenhance works in many fields like business, education, and content creation. It’s flexible and fits well in different work settings.
How can I create an efficient workflow using Affenhance?
Use Affenhance’s tools for managing projects, analyzing data, and team work. This helps make your work flow better and more productive.
What should I consider when getting started with Affenhance?
Start by choosing the right plan for you. Get to know its easy-to-use interface. Use the guides and tutorials for a smooth start.
How does Affenhance support digital marketing efforts?
Affenhance helps with making content, analyzing data, and improving workflows. It makes marketing better by helping teams work together more efficiently.
Now-a-days, phone scams are a big problem. About 1 in 3 Americans have been scammed, losing around $39.5 billion last year. Also, 20% of Americans have been scammed more than once. Scammers get phone numbers from data breaches, social media, and phishing emails.
This article will help you what to do If a scammer has your phone number. It covers quick steps and long-term ways to keep your info safe. By locking your SIM card or blocking spam calls, you can lower the risk of phone number fraud. It’s key to protect your phone number from scams in today’s cyber world.
Key Takeaways
1 in 3 Americans fall victim to phone scams.
Immediate actions are critical to minimize risks.
Locking your SIM card helps prevent unauthorized access.
Use strong passwords and multi-factor authentication for online security.
Blocking spam calls is essential for ongoing protection.
Table of Contents
Understanding How Scammers Obtain Your Phone Number
Scammers use many ways to get your phone number. It’s important to know how they do it to keep your info safe. Many people share too much on social media, making them easy targets for fraud.
Common Methods Used by Scammers
Here are some ways scammers get phone numbers:
Social Engineering: Scammers trick people into sharing personal info.
Phishing: Fake emails and texts try to get sensitive data from you.
Data Broker Lists: Companies sell personal info, including phone numbers.
Stolen Mail: Scammers get phone numbers from mail they steal, leading to identity theft.
Autodialing Technology: Advanced software lets scammers call many people fast to find victims.
Not protecting your social media privacy is a big risk. Many people don’t change their privacy settings, making their phone numbers easy to find. This attracts scammers looking for easy targets.
The Role of Data Breaches
Data breaches are happening more often, putting our personal info at risk. Big cases like the T-Mobile breach in November 2022 show how hackers can get our data. Once this data is out, scammers use it to find and scam more people.
Data Breach
Year
Impact
T-Mobile
2022
Exposed millions of phone numbers
Yahoo
2017
3 billion accounts compromised
Equifax
2017
147 million people affected
Our reliance on weak security makes us more vulnerable. Knowing how scammers work helps us protect ourselves. It’s key to understand what scammers can do with your phone number and take steps to stay safe.
What Can Scammers Do With Your Phone Number?
Learning about the dangers of a stolen phone number is shocking. Scammers can do many bad things that threaten my safety and money. I want to talk about the dangers of having my phone number out there.
Identity Theft Risks
When scammers get my phone number, identity theft risks go up. They might try to swap my SIM, so they get my calls and texts. In 2021, the FBI saw 1,611 cases of SIM swapping scams, costing $68 million. Knowing phone numbers are often leaked makes me worry more about identity theft.
Financial Exploitation
With my phone number, scammers can mess with my money. They can make fake transactions in my name, emptying my accounts. In 2023, scams from phone calls cost Americans $850 million. It’s crucial to stay alert against these threats.
Access to Personal Accounts
Scammers can easily get into my accounts with my phone number. They might trick me into giving them 2FA codes. SMS 2FA is easy to hack, but using apps can help keep my accounts safe.
Threat Type
Description
Statistics
Identity Theft
Scammers may hijack my number to impersonate me and access my sensitive data.
FBI reported $68 million lost to SIM swapping scams in 2021.
Financial Fraud
Unauthorized transactions can occur, draining resources from my accounts.
$850 million lost in scams from phone calls reported in 2023.
Account Access
Scammers could bypass security measures, leading to unauthorized access.
Phone numbers were the 4th most commonly leaked data type in 2021.
What to Do If a Scammer Has Your Phone Number
Discovering a scammer has your phone number is scary. It’s important to know what to do right away and how to protect yourself long-term. Here’s how to keep your info safe if your phone number is stolen.
Immediate Actions to Take
When I think a scammer has my number, I take these steps:
I call my mobile carrier right away to tell them and get help.
I lock my SIM card to stop anyone else from using my number without me knowing.
I change all passwords linked to my phone number to strong, new ones.
I’m careful with any texts or calls I don’t know, especially if they seem urgent.
Long-term Protective Measures
To stay safe from phone scams, I do these things:
I use app-based two-factor authentication to make my accounts safer.
I check my financial accounts often to catch any odd activity fast.
I use mobile security software to protect against phishing and malware.
I stay up-to-date on new scams to avoid them.
About 1 in 4 calls from unknown numbers might be scams. By using strong protection, I lower my chances of getting scammed again.
Actions
Purpose
Contact Mobile Carrier
Alert them about the compromise and enhance account security.
Lock SIM Card
Prevent unauthorized use and SIM swapping.
Change Linked Passwords
Secure accounts against unauthorized access.
Implement App-Based 2FA
Add an additional security layer to my accounts.
Regular Monitoring
Identify unusual transactions early and act swiftly.
Contact Your Mobile Carrier
When I find out a scammer has my phone number, I call my mobile carrier first. They help me protect my account and spot phone scams. They can set up fraud alerts and let me change my number if I want.
This makes it harder for scammers to get to my personal info. My carrier also blocks scam numbers and stops unwanted calls. They have tools to watch for suspicious calls.
If you’ve been scammed, tell your carrier right away. They can help get back what was lost. Acting fast helps keep you safe from more scams.
Lock Your SIM Card for Added Security
Keeping your mobile account safe is key in today’s world. Scams are getting smarter, so locking your SIM card is a good move. It helps stop phone number fraud and keeps your info safe. Here’s how to lock your SIM card on different phones, making them safer from threats.
Steps to Lock Your SIM Card on Different Devices
Every phone is different when it comes to locking your SIM card. Just follow these easy steps for your phone:
For Android Users:
Open the Settings app.
Find and tap Security & Location.
Look for SIM card lock and tap it.
Turn on Lock SIM card and use your PIN.
Make your PIN unique for better security.
For iPhone Users:
Open the Settings app.
Scroll down and tap Cellular.
Find SIM PIN and tap it.
Enable SIM PIN and enter your PIN.
Change your PIN to something new for more security.
Locking your SIM card adds a vital layer of protection. It stops phone number fraud. If you think your SIM card is stolen, tell your carrier right away. Locking your SIM card is a smart way to protect your identity from scammers.
Using Strong Passwords and Two-Factor Authentication
Keeping your online world safe starts with strong passwords. Each account needs a unique password to keep it safe. Mix up letters, numbers, and symbols to make it hard for others to guess.
Enhancing Your Online Security
Two-factor authentication (2FA) adds an extra shield. It asks for two things to prove who you are. But, SMS codes can be risky because scammers can trick you.
Use apps like Authy or Google Authenticator for better security. They make codes that are safer than SMS. This way, you can keep your accounts safe from scams.
October is Cyber Security Awareness month. It’s a good time to check your online safety. Always be careful with emails and keep your passwords and security up to date.
Blocking Scam Calls and Preventing Future Scams
It’s important to block scammer’s number and stop unwanted calls. Phone scams are getting smarter. I have many ways to protect myself. Let’s look at some good methods to keep these calls away.
Methods for Blocking Scammers
I can start by asking my mobile carrier about call-blocking services. Many carriers have features to block spam calls. Also, signing up for the National Do Not Call Registry helps a lot. It’s key to watch out for scams like fake prizes or job offers.
Contact mobile carrier for call-blocking services.
Register with the National Do Not Call Registry.
Set my phone to block private or unknown numbers.
Report scam numbers to authorities for better monitoring.
Utilizing Call-Blocking Apps
Call-blocking apps add extra security. These apps help stop scams and make my phone safer. By using them, I can block unwanted calls and keep my phone clean. Many people say they get fewer spam calls with these apps.
Here’s a quick look at some top call-blocking apps:
App Name
Features
Rating
Hiya
Real-time call blocking, caller identification
4.5/5
Truecaller
Spam detection, messaging service
4.6/5
Mr. Number
Call blocking, reverse phone lookup
4.0/5
Nomorobo
Automatic call blocking, mobile app
4.3/5
Monitoring Your Financial Accounts
It’s very important to watch my financial accounts closely. This helps me spot any suspicious activities that might mean fraud. Doing this keeps my money safe and lets me act fast if something looks off.
Importance of Regular Checks
Checking my accounts often helps me catch problems early. By looking at my statements and transactions regularly, I can fix issues before they get worse. If I ignore this, I could lose a lot of money, so staying alert is key.
What to Look For
When I check my accounts, I look for a few important things:
Unapproved transactions – Any purchases or withdrawals I didn’t okay should make me suspicious.
Odd account changes – Big changes to my info, like my address or phone number, need checking.
Unauthorized charges – Charges I don’t know about could mean a scam is going on.
Missing funds – If my balance goes down without me knowing, it’s a big warning sign.
If I find any problems, telling my bank right away is crucial. Quick action can help fix the issue and get my money back faster.
Indicator
Action Required
Unapproved Transactions
Report immediately to the bank
Odd Account Changes
Verify with the financial institution
Unauthorized Charges
Investigate and report
Missing Funds
Contact the bank to discuss
Common Queries
It’s important to know what happens if scammers take your phone number. Many are worried about their money and safety. Here are some common questions about this issue.
Can someone hack my bank account with my mobile number?
Yes, a stolen mobile number can be risky. Scammers might use it to get your bank’s SMS codes. They could also swap your SIM to control your account, leading to bad transactions. To stay safe, use two-factor authentication and tell your bank about any odd activity.
What can hackers do if they get your phone number?
Having your phone number stolen can lead to big problems. Hackers might steal your identity, take your money, or get into your online accounts. They can pretend to be you and even change your phone’s settings. Sadly, 1 in 3 Americans fall for phone scams. Without good protection, you could lose money and feel really upset.
Should you change your phone number if a scammer has it?
Changing your number might be a good idea if scammers have yours. It stops them from reaching you. Before you do, report the scam to the FTC. They can offer help to keep you safe. Get a new number and make sure it’s secure to avoid future problems.
Conclusion
Staying informed is key in today’s world, especially about phone number scams. Sharing my phone number can lead to big problems like identity theft and financial loss. It’s important to know how to protect my information and assets.
To get over a phone number scam, I need to act fast and take steps to stay safe. Using strong security like two-factor authentication helps a lot. Also, keeping my number private and sharing it wisely can help avoid scams.
In short, being careful and knowing about scams is crucial. By using what I’ve learned, I can keep my phone number safe from scammers. The best way to fight scammers is to stay smart and protect my identity and money.
FAQ
Can someone hack my bank account with my mobile number?
Yes, if a scammer gets your phone number, they might use tricks like SIM swapping. This lets them get past your security and into your bank account and personal info.
What can hackers do if they get your phone number?
Hackers can use your phone number for bad things. They might get into your accounts, skip two-factor checks, steal your identity, and make fake transactions.
Should you change your phone number if a scammer has it?
If you think your number is out, changing it might help. But, you should also add more security and learn how to avoid scams.
How do scammers get your phone number?
Scammers get your number through tricks, phishing, data lists, stolen mail, and data breaches. Keeping your social media private can help.
What can someone do with your phone number?
People can use your number for scams like identity theft and financial fraud. It’s key to be careful and protect your info.
What steps should I take if my phone number is compromised?
If your number is stolen, call your carrier right away. Lock your SIM and change your passwords. Also, set up fraud alerts and boost your online safety.
How can I prevent scam calls with my phone number?
To stop scam calls, use call-blocking apps and sign up for the Do Not Call Registry. Stay alert for scam signs. Also, ask your carrier for call-blocking help.
What are some strong password practices?
Make strong, unique passwords for each account. Use symbols, numbers, and big letters. Turn on Two-Factor Authentication (2FA). Don’t use easy-to-guess info like birthdays.
How often should I monitor my financial accounts?
Check your financial accounts often for odd activity. Doing this weekly can catch fraud early and stop it fast.
What should I look for when monitoring my accounts?
Watch for unauthorized transactions, strange login attempts, and account changes you didn’t make. Also, check for balance changes. Report fraud right away to protect your money.
In today’s world, many people wonder, “how can you protect your home computer?” Cyber threats are growing, making home computer security key. I’ve learned the value of good computer protection tips to keep safe online. These steps help protect your data and make the internet safer for everyone.
As we face new cyber dangers, there are ways to keep your home PC safe. You’ll find tips to help you stay ahead of threats. This will make your home computer more secure.
Key Takeaways
Stay proactive in your approach to home computer security.
Regularly update your operating system to reduce vulnerabilities.
Utilize reliable antivirus software for effective protection against threats.
Create strong, unique passwords for different accounts.
Avoid public Wi-Fi without using a VPN for added security.
Regularly backup your data to prevent loss from attacks.
Be wary of phishing scams that could lead to identity theft.
Table of Contents
Importance of Home Computer Security
In today’s world, keeping your computer safe at home is a must. Cyber threats are growing fast, and knowing the risks is key. Cloud network attacks are up, showing we need strong security at home.
Young people and businesses know they must protect their digital spaces. They use special software to fight cyber threats. It’s also important to change Wi-Fi passwords often and stay alert to digital dangers.
Malware, like viruses and spyware, can harm your computer and steal data. Good antivirus software can help fight these threats. Keeping your software and operating system up to date also helps. Phishing emails and fake websites try to trick people, so staying informed is crucial.
Using strong, unique passwords is a big part of keeping safe. Experts say passwords should be at least eight characters long. They should mix letters, numbers, and symbols. Password managers can help you remember these complex passwords, lowering the risk of identity theft.
Backing up your data regularly is smart, in case of problems. Getting advice from cybersecurity experts can also help. They can give you specific tips to fight off digital threats.
Statistic
Significance
Identity theft complaints reported
Highest reported issue in the U.S.
Common Wi-Fi password hacks
Write monthly to mitigate risks
Use of trusted VPNs
Effective in protecting user identities
Malware types
Viruses, worms, and spyware pose threats
Same password usage
Increases identity theft risk
Antivirus software updates
Reduce risk of identity theft significantly
Keeping Software Updated
Keeping my software up to date is key to protecting my home computer. Cyberattacks are common, and outdated software makes us more vulnerable. Automatic updates are crucial, especially for Windows.
This helps block exploits from unpatched vulnerabilities.
Automatic Updates for Operating Systems
Automatic updates for the operating system are vital. The National Cyber Security Centre says 90% of cyberattacks use unpatched software. Updates keep our systems safe with the latest patches.
Regular updates do more than improve performance. They protect our personal info and keep systems running smoothly.
Updating Applications Regularly
My apps need regular updates too. Small businesses often fall victim to cyberattacks because of outdated software. It’s important to keep all software, including antivirus, up to date.
Checking for updates every few months or setting auto-install during quiet times helps a lot. This way, all software gets the latest fixes, lowering the risk of being hacked.
Software Type
Update Frequency
Risk of Not Updating
Operating System
Automatic Updates (Daily or Scheduled)
High – 90% of attacks exploit unpatched vulnerabilities
Applications
Monthly Manual Check or Automatic
Moderate – 53% of attacks target outdated software
Antivirus Software
Daily Automatic Updates
High – Essential for protection against malware
Using Antivirus Software
In today’s world, using antivirus software is key to protect your home systems. Cyber threats keep getting worse. It’s vital to pick the right antivirus to keep your data safe.
To keep your software up to date is also crucial. This helps stop ransomware attacks.
Choosing the Right Antivirus Solution
Finding the best antivirus software depends on your needs and system. Here are some good options:
Windows Defender – Built into Windows 8, 8.1, RT, and 10, it offers strong malware protection.
Microsoft Security Essentials – Great for older systems like Windows 7 and Vista.
Sophos Home – A top pick for Mac users, it removes viruses, ransomware, and bad apps.
In 2020, over 404 million unique malware samples were found, says AV-TEST. This shows how important good antivirus software is.
Importance of Regular Updates
It’s just as important to keep your antivirus updated. New malware pops up all the time. Regular updates keep your system safe.
Many people forget to update their antivirus. Not keeping it current can leave your system open to threats. Make updating a regular part of your routine to stay safe online.
The table below shows how often you should update different antivirus software:
Antivirus Solution
Update Frequency
Notes
Windows Defender
Daily
Make sure real-time protection is on.
Microsoft Security Essentials
Daily
Update often, especially for older systems.
Sophos Home
Weekly
Follow the setup guide for best results.
Regular updates are key to strong malware and ransomware protection. By doing this, you can feel safer online.
Implementing a Firewall
Setting up a firewall on my home PC is key to keeping it safe. A firewall blocks bad traffic from getting in. It’s like a shield for my computer.
There are two types: hardware and software. Hardware firewalls are great for homes with many devices. They manage all the network activity.
Software firewalls go on each computer. Most come with the computer or can be bought. Windows has a firewall that should always be on.
Getting the firewall right is important. It can stop many bad things, but not all. So, I use more than one way to keep my computer safe.
Keeping the firewall up to date is also key. Watching what it does helps protect against new threats.
Customizable settings, installed on individual devices
Single device protection, specific application monitoring
When I set up my firewall, I make special zones for important stuff. This means I can control who gets in and what they can do. Testing my network helps make it even safer.
How Can You Protect Your Home Computer
Protecting your computer is key. You need to manage passwords well and use two-factor authentication. These steps help keep your computer safe from hackers.
Best Practices for Password Management
Good password management is crucial. I always make strong, unique passwords for each account. This helps a lot because weak passwords are a big problem.
I also use password managers. They keep my passwords safe and easy to manage. This way, I don’t have to worry about forgetting them.
Using Two-Factor Authentication
Two-factor authentication is very important. It makes your accounts much safer. You need to prove who you are twice, like with a code sent to your phone.
This extra step makes it hard for hackers to get into your accounts. Using 2FA is a smart way to protect yourself online.
Safe Browsing Practices
Keeping computers safe online is key. I watch out for suspicious links and downloads. These can lead to malware. It’s also important to know how to spot phishing scams to protect personal info. By using good security, I make the internet safer for everyone.
Avoiding Suspicious Links and Downloads
Many websites, like adult sites and social networks, can have spyware. I’m careful about where I go online and what I download. I also scan my computer often for malware. This helps keep my system safe.
Using cloud services helps too. They use less computer power but still protect well against threats.
Identifying Phishing Scams
Protecting myself from phishing is a big deal. Scammers often pretend to be well-known brands. I’m always on guard, especially with emails I didn’t ask for.
To stay safe, I go directly to websites instead of clicking on email links. Having strong firewalls also helps. They watch the internet traffic and keep me safe from hackers.
Security Measure
Description
Utilize Antivirus Software
Webroot Internet Security Plus and Webroot AntiVirus prevent infiltrations and scan for malicious content.
Regular Software Updates
Ensuring that the operating system and major applications are updated helps minimize security vulnerabilities.
Strong Password Management
Mix upper and lower case letters, include punctuation and numbers, and change passwords every six months.
Data Backups
Perform daily backups, ensuring data is duplicated in multiple locations for added safety.
Beware of Spam
Exercise caution when opening emails from unknown senders to avoid phishing scams.
By following these safe browsing tips, I make the internet safer. This helps prevent malware attacks.
Secure Your Home Network
Keeping my home network safe is key to protecting my personal info. With many devices connected, I focus on a secure wi-fi setup. Here are important steps to boost my network’s security.
Setting Up a Strong Wi-Fi Password
Starting with a strong password is crucial. My router’s password is at least 12 characters long. It has letters, numbers, and symbols. This makes it hard for hackers to guess.
I also use WPA3 or WPA2 for security. These are better than older methods like WEP.
Some routers let you set up a guest network. This is great for visitors. It keeps my network safe without letting them in too much.
Using a VPN for Added Protection
I use a VPN for home use for extra security. A VPN encrypts my internet, making it hard for hackers to get my data. This is important for all devices, like phones and smart TVs.
I choose VPNs that don’t log my activity. They should also have secure servers.
With a strong password, good encryption, and a VPN, I’m sure my network is safe. My data is protected from threats.
Physical Security Measures for Your PC
Keeping your home computer safe is not just about software. Physical security for PCs is key to protecting your data and keeping it safe from unauthorized access. Always lock your computer when you leave it alone. This simple step can greatly reduce the chance of theft, especially in busy places like coffee shops or offices.
It’s also important to keep your devices in safe spots. When you’re on the move or working from somewhere else, make sure your laptop is always in sight or locked up tight.
Using physical locks can add an extra layer of protection. For laptops, use cable locks. For desktops, lock them in cabinets if you can. These steps can help prevent theft and unauthorized access.
Device theft is a big problem. Many laptops are stolen when left unattended, in cars, hotel rooms, or public areas. Having backups of your important data can be a lifesaver if your device is stolen. A good backup plan means you won’t lose your important files.
Be careful with unknown devices, like USB drives. They can have malware that tries to get into your network. Also, be wary of charging your devices in public USB ports. Use data blockers to protect your information from being copied without your permission.
Here’s a table with some effective ways to keep your PC safe:
Preventive Measures
Dos
Don’ts
Device Locking
Use locking cables and secure locations
Leave devices unattended
Data Backups
Regularly back up sensitive information
Neglect backup routines
Use of Unknown Devices
Be cautious with unfamiliar USB drives
Connect unknown devices without verification
Public Charging
Use data blockers when charging in public
Charge devices in unsecured USB ports
Travel Precautions
Keep devices in sight and use hotel safes
Leave devices in hotel rooms unattended
By taking these steps, you can protect your personal and work data better. With more cases of hardware theft and security threats, it’s crucial to strengthen your physical defenses.
Regular Data Backups
Backing up data regularly is key to protect against loss. This includes hardware failures or malware attacks. Knowing about different backup solutions helps keep your data safe. Regular backups mean you can quickly get back what’s lost.
Types of Backup Solutions
There are many ways to store backups, each with its own benefits. Here are some popular ones:
Cloud Storage: Services like Google Drive, iCloud, and Dropbox are easy to use and secure. They often have built-in encryption to keep your data safe.
External Hard Drives: A tried-and-true choice, external drives let you store data safely. They’re less likely to get hit by online threats.
Network Attached Storage (NAS): This option is reliable and secure. NAS devices are safe from risks that affect personal computers.
Tape Backups: Though not as common, tape backups are still used for long-term storage in big companies.
Following the 3-2-1 rule makes backups more reliable. Keep three copies of your data on two different types of storage, with one copy offsite. This protects against many threats.
Best Practices for Backup Frequency
Setting a backup schedule is important for keeping your data safe. Here are some tips:
Back up at least once a week for personal files and every day for important business data.
Test your backup systems often to make sure you can recover data when needed.
Update your backup plan as your data needs change.
Use encryption tools to protect sensitive information, especially when sending it online.
Having a good backup plan gives you peace of mind. It also helps you recover quickly from data loss. By following these steps, you can keep your data safe and easily accessible.
Monitoring and Managing Online Privacy
Keeping your online presence safe is key today. Data breaches and cyber threats are common. By monitoring your online privacy, you can control who sees your personal info. Use privacy settings on social media and stay alert to risks.
Controlling Personal Information Sharing
Many social media profiles are public by default. It’s important to use privacy settings. Check who you’re connected with often to avoid sharing too much.
When you post photos or videos, think about what they show. Things like locations or tags can reveal too much.
Read privacy policies for apps and sites to understand their data access practices.
Engage in discussions with friends and family about limits on shared personal information.
Use unique email addresses and usernames without identifying information during new account sign-ups.
Regularly delete browsing history, cookies, and saved forms to limit data collection.
Employ a Virtual Private Network (VPN) on public Wi-Fi for added security.
Parental controls on computers add safety, especially for kids online. These controls let you limit what they see, monitor their actions, and keep them safe.
To protect your device, use strong passwords. Use the same password everywhere and keep it safe with a password manager. Multi-factor authentication makes your accounts even safer.
Limiting location sharing on devices and apps keeps your info private. These steps help you feel safer online, knowing you’re in control of your privacy.
Common Queries
Many users wonder how to keep their home computers safe. Knowing about home computer security is key. I’ll cover common questions about keeping computers safe, including the latest threats and how to protect against them.
How can you protect your home computer cyber awareness 2024 answers?
Staying up-to-date on cyber threats is important. Training and awareness programs help users spot dangers like phishing scams. Online resources and forums can also help you learn how to keep your computer safe at home.
What are the 4 ways you can protect your computer?
Keep your antivirus software updated to fight malware.
Use strong, unique passwords for all accounts. Use password managers if needed.
Keep your operating system and apps up-to-date to fix vulnerabilities.
Turn on firewalls and use browser security plugins for extra protection.
How can you protect your home computer cyber awareness training?
Have training sessions on spotting social engineering tricks and safe browsing. Talk about recent cyber attacks to raise awareness. Update training often to keep up with new safety tips and the changing cyber world.
How can you protect your home computer from accepting all mobile codes?
To block unwanted mobile codes, change your computer and app settings. Always check messages carefully. Set strict app permissions to stop unwanted interactions. Check these settings often to keep your computer safe.
Conclusion
Securing your computer is a constant effort, not just a one-time job. With threats like malware and phishing, it’s key to stay safe. Keeping your software up to date and using antivirus is crucial.
Using strong passwords and two-factor authentication helps too. A secure home network is also important. Being careful online and teaching others about safety can help a lot.
By updating software, using antivirus, and backing up data, you can protect yourself. Stay alert to new threats and keep your computer safe. This will help keep you and your family safe online.
FAQ
How can I protect my home computer from cyber threats?
To keep your home computer safe, use antivirus software and a firewall. Keep your system and apps updated. Also, browse safely and manage your passwords well.
What are the best practices for home computer security?
For good home computer security, update your software often. Use antivirus and anti-spyware, and enable firewalls. Use strong passwords and two-factor authentication. Back up your data and keep your PCs safe physically.
How often should I update my operating system?
Update your operating system as soon as updates come out. These updates often fix security issues. Set your system to update automatically for easy security.
What antivirus software is recommended for personal computers?
Good antivirus software includes Microsoft Defender, Norton, and Bitdefender. They protect against malware and other threats. Always update your antivirus.
How can I improve my home network security?
To make your home network safer, use a strong Wi-Fi password. Enable WPA3 encryption and consider a VPN. Update your router and disable risky features.
What steps can I take to secure my personal information online?
To keep your info safe online, adjust your social media privacy settings. Be careful with sensitive info and use strong passwords. Use parental controls for family safety.
What types of backup solutions are best for my data?
Good backup options are cloud storage like Google Drive and external hard drives. Back up regularly to keep your data safe and accessible.
How can I protect my computer against phishing scams?
To avoid phishing scams, be careful with emails and links. Use browser extensions and keep your software up to date. This helps protect you from phishing.
What is two-factor authentication, and why should I use it?
Two-factor authentication (2FA) adds an extra layer of security. It requires a second verification, like a code. It’s a great way to keep your accounts safe.
Why is physical security for my PC important?
Physical security for your PC is key to prevent unauthorized access and theft. Lock your computer, use physical locks, and keep devices in safe places. This protects against physical threats.