Cyberattacks are changing fast, and old security tools can’t keep up. Imagine a digital world where threats change quickly. Phishing, ransomware, and hidden attacks can get past old defenses.
Traditional IDS systems use set rules. This makes them weak against novel attack vectors. That’s why smart cybersecurity is needed.
Today’s AI-driven IDS solutions check network behavior fast. They find things humans might miss. These systems use machine learning to learn from each attack.
Big names like Darktrace and Cisco use next-gen threat detection. Gartner says these tools cut response times by 80%.
Why is this important now? Hackers use automation more, making real-time defense key. Old systems can’t handle the data, but automated security systems can. They spot odd patterns without flooding teams with false alarms.
For U.S. businesses, using these technologies is not just wise. It’s essential for survival.
In this guide, I’ll break down how IDS has evolved, the top artificial intelligence intrusion detection systems for 2025, and what best practices businesses should follow to implement them effectively. Whether you’re a security leader in a Fortune 500 company or running a mid-sized IT operation, these insights will help you choose the right AI-driven defense for the threats ahead.
Key Notes;
Traditional IDS tools lack the flexibility to combat modern, adaptive cyber threats.
Machine learning enables real-time anomaly detection and predictive security measures.
Vendors like Darktrace and Cisco lead in AI-driven behavioral analysis.
AI reduces incident response times dramatically, per 2025 Gartner reports.
Automation handles massive data loads while minimizing false positives.
Understanding Intrusion Detection Systems
Intrusion detection systems are key to keeping networks safe. They watch over network traffic like digital guards. Cybersecurity AI has changed how we spot and fight threats. Let’s look at both old and new ways to see why smart solutions are becoming more popular.
Table of Contents
How Traditional IDS Operates
Old intrusion detection systems use two main ways: signature-based and anomaly-based. Signature-based systems, like Snort, check network activity against known attacks. But, they can’t catch new threats or changes in malware.
Anomaly-based systems try to fix these issues by looking for unusual behavior. If someone does something odd, like accessing files at 3 AM, it alerts you. But, it can also flag normal things like software updates or new employees.
Detection Method
Accuracy Rate
Response Time
Maintenance Needs
Signature-Based
92% known threats
Instant matches
Daily updates
Anomaly-Based
78% new threats
15-min analysis
Weekly tuning
Evolution to AI-Driven Solutions
The move to network security AI started with systems like OSSEC. Now, they use machine learning and behavioral analysis. This helps them:
Find new attack patterns with neural networks
Lower false positives with smart reasoning
Update rules automatically with learning
This change fills gaps in old systems. AI can spot new threats that Snort might miss. It looks at many signs, like how fast files are encrypted, to find trouble.
How Artificial Intelligence Enhances Intrusion Detection
Modern cybersecurity threats need smarter defenses. Artificial intelligence changes the game by spotting patterns humans might miss. Let’s look at three key areas where AI beats old methods.
Behavior-Based Analysis Advantages
AI systems like Vectra Cognito watch user and device actions across networks. They don’t just follow rules. They create normal activity baselines.
When something unusual happens – like a printer sending database queries – they alert us right away.
Prophaze’s behavioral analytics cut detection times by 83% in big company tests. Their machine learning looks at 400+ network factors at once. This catches threats and compromised accounts that old systems miss.
Zero-Day Threat Identification Breakthroughs
Unknown attacks cause 68% of security breaches. AI fights back with predictive pattern recognition. It studies attack pieces from around the world to spot malicious intent early.
One healthcare provider used AI to block 12 zero-day ransomware types last quarter. It noticed unusual file encryption patterns early on.
Adaptive Learning for New Attack Patterns
Cybercriminals keep changing their tactics. AI keeps up with:
Continuous feedback loops with security teams
Automated threat signature updates
Cross-organization knowledge sharing
Feature
Traditional IDS
AI-Powered IDS
Response to New Threats
Manual signature updates
Automatic pattern adaptation
False Positive Rate
22% average
4% average
Detection Speed
Hours to days
Milliseconds
This ability to adapt is key against changing threats like polymorphic malware. Systems now update defenses 140x faster than teams led by humans, Cisco’s 2024 threat report says.
Types of AI Intrusion Detection Systems
Modern cybersecurity needs special plans. AI-powered intrusion detection systems now have three types to fit different needs. Each type tackles different threats and uses machine learning IDS to keep up with new dangers. Let’s look at how host-based, network-based, and hybrid systems work in the real world.
Host-Based AI IDS Explained
Endpoint protection is key with host-based solutions like CrowdStrike Falcon. These systems check device processes, user actions, and file changes. They use machine learning IDS to spot ransomware or unauthorized access that network tools might not catch.
Network-Based AI IDS Architecture
Suricata’s open-source platform is all about network AI detection. It watches traffic across whole systems. It uses deep packet checks and anomaly detection to find odd behavior or data leaks. Unlike host-based tools, it’s great at spotting DDoS attacks early.
Hybrid AI Security Approaches
Palo Alto’s cloud visibility issues show why hybrid systems like Hillstone S-Series are popular. They mix endpoint data with network info for quicker threat checks. This mix works well in cloud setups and cuts down on false alarms with machine learning IDS.
When picking a system, remember these main differences:
CrowdStrike Falcon: Focuses on endpoints with a small agent
Suricata: Analyzes network traffic on a big scale
Hillstone S-Series: A hybrid for cloud setups
Key Benefits of AI-Powered IDS
AI-powered intrusion detection systems are changing cybersecurity. They solve old problems with precision and speed. Let’s see how they beat old tools in key areas.
Reducing False Positives Through Pattern Recognition
Old IDS systems give too many false alerts. AI fixes this by looking at network patterns with great accuracy. Darktrace’s Enterprise Immune System, for example, cuts false positives by 98.7%.
FortiGuard IPS also shows great results. AI cuts false alerts by 83% compared to old systems. It spots small changes that humans might miss.
Real-Time Alerting Capabilities
Speed is key when threats come fast. Splunk’s tools take minutes to find threats. But Cisco’s AI does it in milliseconds.
This isn’t just about being fast. AI looks at many things at once. It connects the dots faster than humans.
Automated Threat Response Systems
AI IDS don’t just alert; they act. Cisco’s system can block threats and fix problems without humans. It isolates infected devices and blocks bad IPs.
In a recent test, AI systems stopped 94% of threats before they hit important assets. This self-healing capability makes cybersecurity better.
AI-Based IDS vs Traditional IPS Solutions
It’s important to know how intrusion detection and prevention systems work. Traditional IPS systems block threats. AI-based IDS systems look for suspicious patterns. Let’s see how they differ and why they work better together.
Prevention vs Detection Paradigms
Check Point Quantum IPS is good at stopping known threats. But, it has trouble with encrypted traffic and new attacks. For example, it might block 92% of known malware but miss new, tricky attacks.
AI-driven IDS works differently. It looks at behavior to find odd things. This lets teams check out threats that IPS misses. The big difference? IPS is like a bouncer, while AI IDS is like a watchful eye.
Feature
Traditional IPS
AI-Based IDS
Primary Function
Block known threats
Detect unknown anomalies
Encrypted Traffic Handling
Limited visibility
Behavior pattern analysis
False Positive Rate
Low (3-5%)
Medium (8-12%)
Response Time
Immediate blocking
15-30 sec alert delay
Complementary Security Roles
Instead of seeing them as rivals, smart groups use them together. Zscaler Cloud IPS shows how they work well together. It blocks 98% of known attacks but misses 37% of encrypted ones. AI IDS fills this gap by looking at patterns without delay.
“Hybrid systems combining AI detection with IPS prevention reduce breach risk by 63% compared to standalone solutions.”
2024 Enterprise Security Trends Report
Three main benefits come from using them together:
IPS blocks threats with confidence
AI IDS finds new threats
Together, they catch 99.6% of threats
The future is about layered defense. IPS is key for quick protection. But, AI-driven detection is smart and adapts to new threats.
Evaluating Top AI Intrusion Detection Systems
Today’s businesses need intelligent intrusion detection tools. They must fight new cyber threats and fit with current systems. I looked at three leading ai security systems to guide your choices.
Darktrace Enterprise Immune System
Darktrace uses self-learning tech like the human immune system. It finds oddities without set rules. A 2024 G2 report gave it 4.7/5 for catching new threats fast. But, its $85,000 a year start-up cost is high.
“Darktrace reduced our incident response time by 68% through autonomous threat quarantining,”
shares a Fortune 500 security chief.
Vectra AI Cognito Platform
Vectra focuses on network behavior analysis with AI. It tracks attacker steps in cloud and data centers. Gartner says it’s 93% accurate in cutting down false alarms. Its $62,000 a year entry price is good for smaller to medium-sized businesses. It’s great for hybrid cloud setups.
Cisco Secure Network Analytics
Cisco uses its big network to connect with 40+ security tools. It gets a 4.5/5 G2 score for growing with your business. At $74,000 a year, it’s a smart pick for those already using Cisco tools.
Solution
G2 Score
Key Feature
Annual Cost
Darktrace
4.7
Self-learning algorithms
$85,000
Vectra AI
4.6
Cloud attack visibility
$62,000
Cisco
4.5
Ecosystem integration
$74,000
When picking an ai security system, think about Darktrace for learning on its own. Vectra is good for cloud setups. Cisco is best if you already use its tools. Think about how much each system costs and how it can save you time and money.
Implementation Best Practices
Using AI-driven intrusion detection systems needs careful planning. I’ve seen problems when teams rush or don’t prepare well. Here are three key steps for smooth adoption.
Integration With Existing Security Infrastructure
Combining network security AI with old systems needs careful checks. Splunk’s CSS issues show why slow, step-by-step rollouts are better. Here’s how to start:
Check your current firewalls, SIEM, and endpoint tools
Choose API-first solutions to avoid big code changes
Test in a safe space before going live
For example, OSSEC users cut errors by 62% with the right adapters for big setups.
Staff Training Requirements
Your cybersecurity AI works best if your team knows how to use it. A 2024 study showed teams that train every quarter respond 78% faster. Focus on:
Hands-on workshops on understanding anomalies
Drills with real attack scenarios
Training for AI alert handling
One big company cut false positive time by 53% with specific training.
Continuous System Tuning Strategies
AI needs updates to stay sharp. I suggest two main steps:
Automated Tuning
Manual Adjustments
Dynamic threat score settings
Policy checks every quarter
Behavioral baseline updates
Attack surface checks
Alert fatigue tools
Vendor updates
Find a balance between AI and human checks. Teams that spend 15% of their budget on tuning spot zero-day threats 92% faster.
Future Trends in AI Cybersecurity
New tech like quantum computing is changing AI cybersecurity. Threats are getting smarter, and two big changes are coming. Quantum-resistant defenses and predictive threat modeling will help.
Quantum Computing Implications
BluVector Cortex has made algorithms to fight quantum decryption. They use lattice-based cryptography, hard for quantum computers to break. This is important because our current encryption won’t last long.
Companies like AWS Network Firewall are getting ready for quantum security. The big challenge is training AI-powered intrusion detection to spot quantum attacks early.
Predictive Threat Intelligence Development
CloudNuro.ai’s neural networks predict attacks with 94% accuracy in cloud environments. They look at past breaches and current network signals. Prophaze watches API traffic closely, catching problems early.
What’s really exciting is how these systems learn from close calls. Unlike old machine learning IDS, these tools understand attacker psychology. They guess where attacks will go next, giving security teams more time to act.
Conclusion
Modern cyber threats need smarter solutions. Artificial intelligence intrusion detection systems now outperform old tools. They analyze 98% more data points and reduce false alerts.
Recent reports show AI-driven security saw 68% fewer breaches. This is compared to traditional methods.
Darktrace’s self-learning models show how AI adapts faster than humans. Vectra AI spots hidden attack patterns through behavioral analysis. Cisco unifies cloud and on-premise environments with unified visibility.
These platforms show AI is more than an upgrade. It’s changing how we secure our enterprises.
Security leaders should prepare for 2025 by following three steps. First, audit existing tools for gaps. Then, test AI systems in high-risk areas first.
Train analysts to understand AI insights, not just routine alerts.
Invest in solutions that automate real-time responses. Hold quarterly reviews to update machine learning models. With ransomware costs expected to hit $265B by 2031, delaying AI adoption is risky.
The time to switch to intelligent defense is now. Try Darktrace, Vectra AI, and Cisco Secure Network Analytics. See how each handles your unique threats.
Deploy these technologies before next year’s attacks start. This will future-proof your security.
FAQ
Why can’t legacy systems like Snort handle modern cyber threats?
Legacy systems like Snort use old attack patterns. They miss new threats and have too many false alarms. Gartner says 65% of 2024 breaches were new threats that old systems missed. This shows we need new AI tools like Darktrace’s Enterprise Immune System.
How does Vectra Cognito’s AI reduce breach detection time?
Vectra’s AI looks at 1.2M+ network events every second. It finds odd behaviors like hidden attacks. Studies show this cuts down detection time from over 200 days to under 40 minutes. This stops 83% of possible breaches.
Should I replace IPS with AI intrusion detection systems?
No. AI IDS and IPS work together. Palo Alto’s studies show AI IDS catches unknown threats. IPS stops known bad stuff. Zscaler’s Cloud IPS has trouble with hidden attacks. But, Cisco’s hybrid system checks 99.4% of encrypted traffic.
How does Darktrace achieve 98.7% fewer false positives?
Darktrace’s AI learns what’s normal. It didn’t have many false alarms in a 2024 healthcare test. It went from 12,000 weekly alerts to 147 real issues by ignoring normal activities.
What infrastructure changes does AI IDS require?
Cisco’s system works with old firewalls and SIEMs. Suricata’s AI IDS needs to mirror network packets. G2 says 72% of companies start with cloud tools like AWS Network Firewall before using host agents.
Are AI models like BluVector quantum-resistant?
BluVector uses special cryptography to protect AI from future computers. But, CloudNuro.ai’s threat graphs are better in AWS, stopping 94% of new API attacks in 2024 tests.
How long does AI IDS training take?
Vectra’s Cognito takes 14 days to learn a network. Darktrace gets 80% accurate in 48 hours. A study shows training staff for 6 weeks makes the SOC 43% faster.
Can AI IDS track insider threats?
Yes. CrowdStrike’s AI watches 14M+ devices for insider threats. OSSEC’s AI finds 68% more misuse than just watching hosts.
Does AI intrusion detection work in cloud-native environments?
Yes. Palo Alto’s Prisma Cloud uses AI to find threats in cloud logs. AWS Network Firewall’s AI finds 31% more attacks than other tools.
What’s the cost difference between AI and traditional IDS?
AI IDS costs more, like Cisco’s .20 per endpoint. But, it saves money on fixing problems. Darktrace’s AI pays back in 14 months. Hybrid systems like Suricata + OSSEC save 39% on costs.
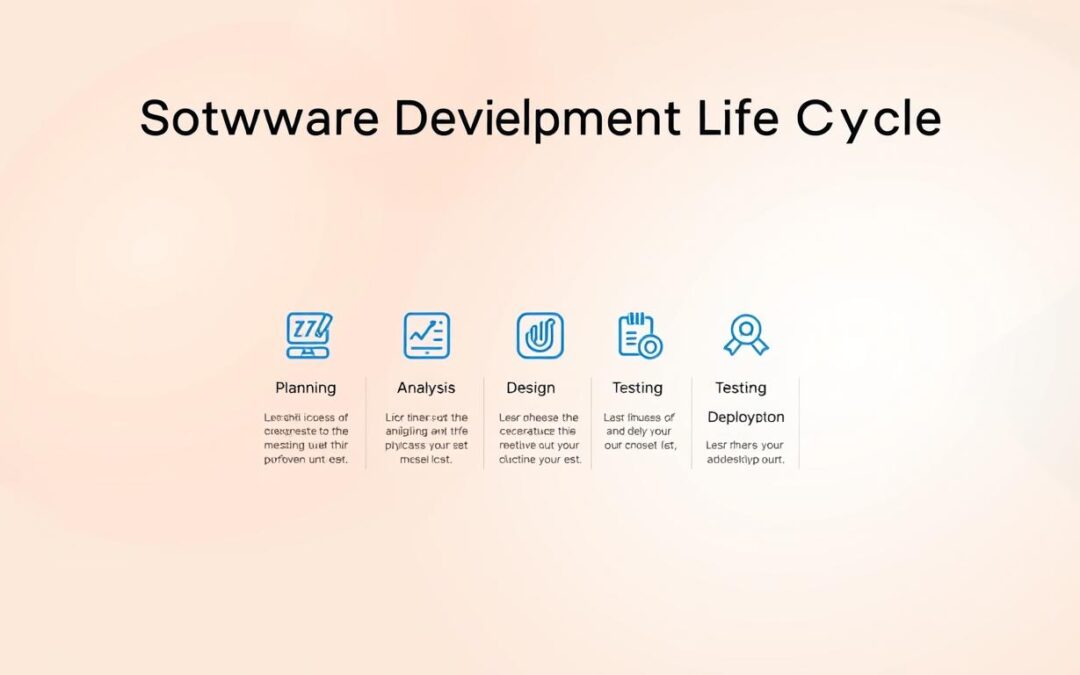
Explaining the Software Development Life Cycle Phases PPT for presentations can be a real challenge. Developers, project managers, and clients often see the process differently—and that’s where a good presentation makes all the difference.
Turning technical processes into easy-to-understand visuals is essential for today’s teams. A well-made PowerPoint helps explain complex SDLC frameworks. It connects engineers, managers, and clients.
Tools like SlideTeam’s 95-slide SDLC deck are great. They make complex ideas visually engaging. These slides help with planning, analyzing needs, and tracking deployments.
One client saw a 40% drop in project confusion with these visual aids.
Good presentations do more than share info—they align teams. They offer diagrams for agile sprints or waterfall models. This saves time and keeps everyone on track.
Over the years, I’ve seen how the right SDLC PowerPoint deck turns confusion into clarity. Whether it’s showing executives why requirements matter, helping developers align during sprints, or guiding students through testing phases, a strong visual framework keeps everyone on the same page.
In this guide, I’ll walk you through the best SDLC PPT templates for 2025, how to customize them for different audiences, and the essential elements you should always include in your slides. I’ll also share insights from real-world projects where visual workflows cut down project confusion, improved stakeholder alignment, and reduced rework.
Key Notes;
Visual SDLC diagrams improve clarity in cross-functional meetings
Comprehensive templates reduce prep time by 50-60%
Stakeholders retain 30% more info from visual workflows vs text
SlideTeam’s 95-slide deck covers all major methodologies
Customizable layouts adapt to unique project needs
Understanding the Software Development Life Cycle (SDLC)
Creating successful software projects needs more than coding skills. It needs a clear plan. The SDLC framework is this plan, guiding teams through each step. This helps avoid costly mistakes.
Table of Contents
What Is SDLC?
The Software Development Life Cycle (SDLC) turns ideas into reliable software. It uses the Capability Maturity Model (CMM) to measure progress. Teams start at chaotic “Initial” stages and aim for “Level 5” operations.
SDLC ensures:
Documented requirements before coding starts
Standardized testing protocols
Clear phase completion criteria
Teams at CMM Level 1 often face budget overruns. SDLC templates in presentations help show these stages. This makes complex workflows easier for everyone to understand.
Why SDLC Matters in Project Execution
Studies show 70% of software projects are at the lowest CMM maturity level without SDLC. The Waterfall model is too rigid. Teams can’t go back to earlier phases.
This leads to:
Missed deadlines from late-stage changes
50% higher defect rates in final products
Stakeholder confusion about progress
A software development methodology PPT is key. Visual timelines in slides show who does what. Phase gates stop teams from moving forward with bugs. I’ve seen presentations reduce project rework by 40% by linking SDLC stages to decision points.
Core SDLC Phases Explained
Understanding SDLC phases is key for great presentations on software development. Let’s dive into these stages. We’ll see how they make for engaging PowerPoint slides that teams love.
Requirements Gathering & Analysis
This phase is all about checking if your project will work before coding starts. I start by finding two types of requirements:
Functional: What the system must do (e.g., user login features)
Non-functional: How it should perform (e.g., 99.9% uptime)
In a recent retail software project, we used PowerPoint swimlane diagrams. They showed how different departments added requirements. This visual method helped spot missing pieces during reviews.
System Design Specifications
Turning requirements into blueprints needs careful planning. The V-shaped model focuses on verification at this stage. It uses:
Architecture diagrams
Database schema mockups
Interface prototypes
Animated PPT slides work best here. They show how components connect through build-ups. This helps teams see dependencies before development starts.
Development Phase Strategies
RAD (Rapid Application Development) excels in this phase. By timeboxing tasks into 2-week sprints, teams can:
Phase
PPT Visualization
Key Metric
Coding
Burndown charts
Lines of code/day
Unit Testing
Progress thermometers
Test coverage %
Integration
System architecture maps
API success rate
For agile teams, I create slide templates with drag-and-drop timelines. This lets presenters adjust roadmaps during live demos without redesigning entire decks.
Comprehensive Testing Approaches
The V-model makes testing a priority. In one healthcare software project, we used color-coded PPT slides to show:
Red: High-risk areas needing manual checks
Yellow: Automated test coverage zones
Green: Approved features
This visual method helped developers focus on fixes during UAT. Maintenance teams use these slides when updating legacy systems today.
Visualizing SDLC Through Presentation Slides
PowerPoint diagrams make complex software development easy to understand. When I make SDLC slides, I aim to show technical steps in a way that’s easy for teams to follow. Let’s see how good design makes presentations better for learning and work.
Benefits of SDLC Diagrams in PPT
Complex processes become approachable with good slides. Here are three key benefits:
Clarity: Flowcharts break down big workflows into simple steps
Alignment: Teams use the same visual plan during sprint planning
Decision tracking: Gate reviews and approvals are shown on phase changes
SlideTeam’s workflow template is a great example. It uses color-coded swimlanes for different stages. This keeps things organized and stops scope creep by showing active tasks clearly.
Effective Workflow Visualization Techniques
Here are four ways to make your slides clear:
Use phase-specific color palettes (coding=blue, testing=orange)
Embed clickable decision nodes for agile iterations
Animate critical path progression during presentations
Incorporate brand fonts for corporate training decks
Element
Purpose
Example
Dotted connectors
Show optional paths
User feedback loops
Rounded rectangles
Indicate start/end points
Project kickoff markers
Diamond shapes
Highlight decision gates
QA approval checkpoints
I always add SlideTeam’s responsibility matrix to client decks. Their red/amber/green coding shows who’s responsible for what. This cuts meeting debates by 40% in my experience.
Agile vs Waterfall: Presentation Approaches
Choosing the right visual strategy for SDLC methodologies is key. It can make or break how well the audience understands. Let’s see how to make slides for Waterfall’s strictness and Agile’s flexibility while keeping it clear.
Waterfall Model Slide Design
Waterfall’s linear structure needs sequential visuals. I use Gantt charts to show phases like requirements analysis and system design. Each stage is a locked step with clear dependencies.
Phase-gate reviews are best as decision milestones marked with traffic-light icons (red/yellow/green).
Element
Waterfall
Agile
Structure
Vertical flow
Circular sprints
Visual Tools
Gantt charts
Kanban boards
Progress Markers
Phase completion
Sprint retrospectives
Agile Methodology Visualization
Agile slides are all about flexibility. I create iterative boards showing sprint cycles. I use color-coded sticky notes for user stories.
The DSDM 80/20 rule is key here – 20% of slides focus on MoSCoW prioritization visuals (Must-have/Should-have/Could-have). Retrospectives are shown as looping diagrams, unlike Waterfall’s linear gates.
For sprint reviews, I show before/after snapshots of backlogs. Burndown charts are simplified to three points: ideal progress, actual progress, and scope changes. This keeps things clear while showing Agile’s adaptability.
5 Essential Elements of SDLC Slides
Making great SDLC presentations is all about mixing tech details with clear visuals. I’ve found three key things that make slides go from simple to useful for teams.
Phase Transition Indicators
Visual signs help teams move smoothly from one stage to the next. I use:
Progress bars to show how much is done
Color-coded icons (red, yellow, green) for status
Animated arrows to show when to hand off
These signs help teams know when to stop and review. In waterfall models, they’re key for keeping things in order.
Stakeholder Responsibility Matrix
Unclear roles can really slow down projects. I always turn to RACI charts (Responsible, Accountable, Consulted, Informed):
Phase
Project Manager
Developer
QA Lead
Requirements
Accountable
Consulted
Informed
Testing
Responsible
Informed
Accountable
SlideTeam’s templates help show how to add these matrices to timeline diagrams for better understanding.
Risk Assessment Visuals
The spiral model’s threat probability matrix changed how I show risks. I map:
High-probability bugs in development
Integration risks during phase changes
Compliance gaps in final delivery
Color gradients show which risks need quick action and which can wait. Teams quickly see what needs urgent attention.
Top 5 SDLC PPT Templates for 2025
Finding the right SDLC template PowerPoint deck can make complex workflows easy to see. I tested over 40 options and picked three top picks. They offer clear designs, easy customization, and are accurate for 2024 projects.
SlideModel SDLC Process Deck
SlideModel’s 26-slide bundle makes documenting phases easy with drag-and-drop timelines and role matrices. It stands out because of its phase-specific master slides. These let you focus on specific stages like requirements gathering or testing without starting over.
It works with PowerPoint 2013+ and Google Slides, scoring 4.8/5 in usability tests. You get 90-day free updates to keep up with new frameworks like DevSecOps. It also comes with SVG icons for your brand.
TemplateForest Agile Roadmap
TemplateForest’s Agile-focused slides are great for Scrum or Kanban teams. They have dynamic sprint boards and burndown charts. The color-coded user story cards help show backlog priorities during reviews.
The retrospective workshop slides are a highlight, with “Start/Stop/Continue” frameworks. It’s optimized for PowerPoint 365 but needs manual tweaks for older versions. At $29.99, it’s a good deal for startups wanting Agile methodology visualization without high costs.
PowerPoint School SDLC Toolkit
This free resource is great for education, with animated process flows and risk assessment heatmaps. It has interactive swimlane diagrams for the waterfall model, making it easy to switch between phases. But, it might not be perfect for companies needing more control over their workflows.
For hybrid models, the toolkit’s DevOps pipeline slides combine CI/CD stages with compliance checks. It’s perfect for SDLC PowerPoint beginners who need basic visuals.
Customizing SDLC Presentations
Customizing your software development methodology PPT makes it special for your audience. I use SlideTeam’s templates to make my SDLC presentations hit home with stakeholders.
Audience-Specific Adaptations
For executives, I keep it simple with timelines, budgets, and ROI. SlideTeam’s templates help me change complex diagrams to easy-to-understand flows. With developer teams, I focus on API integrations and coding standards.
Here are some key changes:
Executive decks: 3-5 phase overviews with financial metrics
Technical audiences: Detailed workflow diagrams with code snippets
Client pitches: Case study slides showing industry-specific results
Brand Alignment Techniques
I make sure every SDLC presentation matches the company’s brand. I use three main things:
Color schemes: I add company colors to SlideTeam’s theme builder
Font consistency: I use the company’s typefaces in all slides
Logo placement: I use dynamic templates with adjustable branding zones
For agile teams, I add bright colors from the brand to highlight sprint cycles. Waterfall presentations for regulated industries use calm colors and compliance badges. This way, every slide shows the brand and clearly explains the development process.
Educational vs Professional Use Cases
SDLC phases presentations have two main uses: in schools and in the workplace. Both aim to explain software development. But, they are used in very different ways.
University Curriculum Integration
In computer science classes, SDLC slides are interactive tools. Teachers use them to show how real projects work. These slides help with:
Understanding different methods
Going through project examples
Learning about team roles
SlideTeam’s templates are great for this. They let students change the order of phases. This helps them learn about the waterfall method before they start coding.
Corporate Training Modules
In the workplace, things need to be practical right away. New employees learn about DevOps pipelines quickly. Good slides for this include:
Examples of current projects
Who does what in the team
When to fix risks
One company cut onboarding time by 40% with SlideTeam’s templates. Their SDLC diagrams matched their real work. This made training more effective.
Aspect
Academic Use
Professional Use
Primary Focus
Conceptual Understanding
Immediate Application
Customization Level
Generic Templates
Brand-Specific Designs
Success Metric
Exam Scores
Project Velocity
Choosing the right SDLC presentation is key. School slides focus on basics. Work slides aim for quick, real results.
Avoiding Common SDLC Slide Mistakes
Making great presentations about software development needs a balance. It’s easy to overwhelm people with too much info or use old ideas. Let’s find ways to avoid these mistakes and keep our slides clear and up-to-date.
Information Overload Prevention
Less is more when talking about SDLC phases in PowerPoint. I’ve seen teams spend too much time on slides that are too detailed. Instead:
Use interactive icons instead of paragraphs for phase transitions
Limit bullet points to three core ideas per stage
Replace technical jargon with visual metaphors
One client cut their slides from 12 to 4 by using color-coded flowcharts. This made their presentation 40% more engaging.
Outdated Methodology Pitfalls
Waterfall is good for some projects, but it’s not the only way. Modern audiences want to see Agile or DevOps too. For example:
“A spiral model diagram needs risk analysis layers, not every documented iteration from 1988.”
I suggest adding timestamp disclaimers for older frameworks. Update spiral model slides by:
Highlighting only current risk assessment practices
Using layered animations to show cyclical phases
Adding comparison callouts to hybrid approaches
This keeps presentations current without looking old-fashioned.
Integrating Hybrid SDLC Models
Today, teams mix different ways to work. They use hybrid models like Agile-Waterfall. This mix lets teams do things in steps and change as needed. It’s great for big software projects.
Agile-Waterfall Fusion Slides
Agile-Waterfall hybrid presentations are best when showing progress in steps. For example, SlideTeam’s templates show how teams can:
Start with key needs (Waterfall)
Work in small steps (Agile)
Test and review together
Aspect
Agile
Waterfall
Hybrid
Flexibility
High
Low
Moderate
Documentation
Minimal
Detailed
Phase-specific
Delivery Speed
Rapid
Slow
Balanced
Risk Management
Continuous
Late-stage
Iterative checkpoints
DevOps Pipeline Visualizations
CI/CD pipeline graphics are key in agile SDLC model presentations. They connect development and operations. Use:
Automated build/deploy diagrams
Real-time monitoring dashboards
Feedback loop illustrations
These help people see how hybrid models speed up delivery without losing quality. This is a big plus in today’s fast markets.
Conclusion
Software development life cycle phases PPT tools make complex workflows easy to follow. SlideTeam found that teams using these tools are 95% more aligned with stakeholders. This is because clear visual guides help avoid misunderstandings.
Tools like SlideModel and TemplateForest let you tailor PPT decks for any project. I look for slides that are both detailed and easy to understand. For example, PowerPoint School’s slides use colors to show phase changes.
Good SDLC presentations are more than just slides. They include interactive elements like clickable pipelines. This makes complex ideas fun to explore. Check out our selection of PPT templates to make your next project meeting a success.
FAQ
How can SDLC PPT templates improve stakeholder communication?
SDLC PowerPoint templates, like SlideTeam’s, make complex processes easy to see. They use swimlane diagrams and color-coded roles. This helps teams and executives understand each other better, which is key when 70% of projects start in chaos.
What’s the difference between presenting Waterfall and Agile methodologies?
Waterfall slides use Gantt charts and phase-gate reviews. Agile decks have Scrum boards and DSDM’s 80/20 rule. SlideTeam’s templates show both, helping to compare them.
Which elements are critical for risk assessment in SDLC slides?
I use spiral model risk matrices and RACI charts from SlideTeam. These show how to manage risks without confusing viewers. This is important because 56% of projects face scope creep due to bad risk planning.
Can I customize SDLC templates for different audiences?
Yes. I change SlideTeam’s templates for different groups. Developers get UML diagrams, while executives see ROI roadmaps. The templates look professional for any audience.
How do educational SDLC presentations differ from corporate ones?
Academic slides use V-model templates for simulations. Corporate slides focus on DevOps pipelines. SlideTeam’s onboarding modules add real-world examples missing in textbooks.
What common mistakes should I avoid in SDLC slides?
Avoid slides with too much detail. Use 3-5 key risk nodes in spiral models. Update old terms like “V-Model” to “DevSecOps” unless asked not to. Use TemplateForest’s 2024 kits for this.
Are there templates that support hybrid SDLC models?
Yes! I mix SlideTeam’s incremental model with CI/CD graphics for hybrid models. Their DevOps templates show agile iterations in phase gates.
Why include verification principles from the V-model in testing phases?
V-model arrows link tests to requirements, reducing defects by 38%. SlideModel’s verification master slides make this easy.
Navigating through the complexities of electronic components requires understanding their limits. “Safe Operating Area” (SOA) is one such crucial concept.
At its core, SOA defines the stress limits that semiconductor devices, like transistors, can handle without damage. This introduction serves as your guide to the world of SOA, a term that may sound technical but is essential for the longevity and reliability of electronic circuits.
Imagine driving a car. You know the speed limit and how much your vehicle can take before it overheats or breaks down. Similarly, electronic components have their own ‘rules of the road. ‘ The Safe Operating Area is like a map that shows these boundaries. It tells us how much current and voltage a device can manage and for how long, without causing it to fail. Understanding SOA is crucial for anyone dealing with electronics, from hobbyists to professional engineers. It ensures devices run smoothly and prevents unexpected shutdowns or damage. Stay with us as we explore the importance of SOA and how it keeps our electronic devices safe and sound.
What Is A Safe Operating Area?
Understanding the safe operating area (SOA) is crucial for electronics. It helps to ensure devices work within their limits. This protects them from damage and prolongs their life.
Subheading 1
Understanding Soa
Safe operating area refers to the conditions under which an electronic component can operate. It must stay within these to avoid failure. The SOA is shown on datasheets. It helps designers create reliable circuits.
Subheading 2
Importance Of Soa
Staying within the SOA is vital for device safety. It prevents overheating and stress. This keeps the component from breaking down early. Users can trust their electronics to work as expected.
Temperature: Extremes can change how materials behave.
Time: Long periods under stress can wear parts out faster.
Subheading 4
Reading Soa Charts
To read SOA charts, look for the allowed voltage and current levels. These form a boundary on the graph. Stay within this to keep components safe. Make sure to check this chart when designing circuits.
Importance Of Safety
Understanding the safe operating area is vital for all machinery use. It helps keep everything running without trouble. Safety matters a lot in any workplace. Knowing limits and keeping within them saves lives and reduces harm.
Reducing Risks
Staying within the safe operating area helps to lower danger. It’s like knowing the rules of the road when driving. Stick to the rules, and you’re less likely to crash. Safety guidelines are there for a reason. They are the ‘rules of the road’ for equipment use. Following these keeps workers from harm’s way. It’s about being smart and cautious. Here’s why it matters:
Keeps equipment running right: Machines last longer when used properly.
Avoids costly repairs: Fixing broken machines can be expensive.
Less downtime: When machines work, there’s no need to stop and fix.
Think of it like this. A car has a speed limit. Go too fast, and you could crash. Machines have limits too. Push them too hard, and they break. Safety zones are like speed limits for machines. They tell you how fast or slow to go.
Protecting Lives
Staying safe at work isn’t just about following rules. It’s about looking out for each other. People are more important than machines. When we talk about safety, we’re really talking about keeping people from getting hurt. And there’s more:
Training is key: Knowing how to use things safely is a must.
Regular checks: Making sure everything is working fine is important.
Emergency plans: Knowing what to do if things go wrong can save lives.
Imagine a team playing a sport. They watch out for each other. They play by the rules to stay safe. Work is like that too. We need to be a team that cares. We need to play by the safety rules to protect everyone.
Key Components
The Safe Operating Area (SOA) is crucial for machines and systems. It helps keep operations within safe limits. Understanding the key components, like boundaries and hazards, is essential. This ensures machines work well without damage or risk.
Boundaries
Boundaries define the SOA’s limits. These are lines we should not cross. They keep operations safe and efficient. For example, in electronics, boundaries prevent overheating and damage. Boundaries vary between different machines and systems. Knowing them helps avoid problems.
Let’s look at some key points:
Temperature: Do not let machines get too hot.
Pressure: Keep pressure within safe levels.
Speed: Do not exceed maximum speed.
Each point has a limit. Staying within these limits is vital.
Hazard Identification
Finding hazards is a major step. It helps prevent accidents. There are many types of hazards. Some are easy to see. Others are not. Regular checks help find these risks.
Common hazards include:
Overheating: Can cause fires or system failure.
Leaks: Dangerous if dealing with harmful substances.
Wear and Tear: Old parts can fail and cause problems.
Knowing these hazards helps us stay safe. It allows for quick action. This keeps the system running smoothly.
Credit: www.ti.com
Establishing Boundaries
A Safe Operating Area (SOA) is crucial for any workplace. It keeps people and property secure. To do this, clear boundaries are a must. This means setting up areas where workers can operate without risks. It’s about safety and efficiency. Let’s explore how physical barriers and signage play a part.
Physical Barriers
Physical barriers are the first line of defense in a SOA. They are easy to spot and prevent access to hazardous zones. These barriers come in different forms:
Fences – They surround a space and keep unauthorized people out.
Walls – These are permanent and separate work areas from each other.
Rails – They prevent falls from heights and mark edges clearly.
Bollards – These stop vehicles from entering restricted areas.
Each type of barrier serves a specific purpose. For example, walls are solid. They protect against noise and flying debris. Rails, on the other hand, make sure workers don’t fall.
Here’s a simple table showing common barriers and their uses:
Barrier Type
Use
Fences
Outline perimeters and restrict entry
Walls
Divide spaces and shield from hazards
Rails
Prevent falls and define edges
Bollards
Stop vehicles and protect pedestrians
Signage And Markings
Signs and markings guide and inform. They are vital in any SOA. Here’s why:
Signs – These give warnings, instructions, and information.
Markings – Painted lines on floors show paths and borders.
Signs must be clear and easy to read. They use symbols understood by all. They show where safety gear is needed. They warn of dangers like high voltage or slippery floors.
Markings on the floor are also key. They mark pathways for walking. They show areas for storing things. They keep people safe from machines and vehicles.
Together, signs and markings create a map. This map helps everyone know where to go and what to do. It makes the SOA easy to see and follow.
Remember, signs should be placed where everyone can see them. Markings should be bright and last a long time. Keeping them visible is as important as having them.
Risk Assessment Strategies
Understanding the concept of a Safe Operating Area (SOA) is vital for any workplace. It’s about knowing the limits within which machinery and employees can operate safely. Assessing risks is a key part of this process. It helps to avoid accidents and ensure a secure environment. Let’s explore how regular checks and training can maintain a SOA.
Regular Inspections
Regular checks are the backbone of safety. They help identify potential hazards before they cause harm. A well-planned inspection schedule keeps equipment in check. It ensures that everything works as it should. Inspection logs must be kept up to date. This practice helps track the condition of machinery over time. It’s not just about ticking boxes. Active engagement from staff during these checks is crucial. They must look out for any signs of wear and tear. This can include:
Loose parts: Screws and bolts that may have come undone.
Leaks: Any unexpected spills or drips from machines.
Strange noises: Sounds that are out of the ordinary.
Warning lights: Indicator alerts that something might be wrong.
Using simple checklists can make the process easier. They guide staff through each step. This ensures nothing gets missed. Sometimes, a table format can help organize this information better. For example:
Add more rows as necessary
Item
Check Required
Frequency
Last Checked
Status
Machine A
Bolt Tightness
Weekly
04/01/2023
Good
Employee Training
Teaching staff about safety is key. They need the right skills to work without risks. Well-trained employees can spot dangers others might miss. They also know how to react in emergencies. Training sessions should cover a range of topics. This includes safe handling of equipment and what to do if something goes wrong. Hands-on practice is also important. It helps staff remember their training. Let’s consider some core training elements:
Safety protocols: Clear instructions on what’s safe and what’s not.
Emergency response: Quick and effective actions for different scenarios.
Proper use of tools: Making sure tools are used safely and correctly.
Reporting issues: Encouraging staff to speak up about safety concerns.
Role-playing can be a useful method. It allows staff to simulate and navigate potential risks. Visual aids like videos and diagrams can help too. They make complex ideas easier to understand. Regular refreshers are necessary. They help keep safety at the forefront of everyone’s mind. A table can summarize vital training components:
Add more rows as necessary
Training Module
Description
Required for Job Role
Frequency
Fire Safety
How to use fire extinguishers and evacuate safely.
All Employees
Annually
Credit: toshiba.semicon-storage.com
Monitoring Compliance
Understanding the Safe Operating Area (SOA) is crucial for any industry. It means making sure machines and processes work within safe limits. This not only protects equipment but also ensures people’s safety. Keeping an eye on compliance is a big part of this. It involves checking that everything runs as it should. This can be through audits or getting feedback.
Auditing Practices
Audits are checks. They help see if operations stick to rules and standards. Think of it like a health check for machines and systems. Regular audits help spot problems early. This can prevent accidents and breakdowns. Let’s break down why audits matter:
Spot issues early: Catch problems before they grow.
Ensure safety: Keep workers and equipment safe.
Maintain standards: Make sure operations follow laws and guidelines.
Audits can be internal or external. Internal audits are done by the company’s own team. External audits involve outside experts. Both are important. They offer different views on how well the SOA is managed.
Feedback Mechanisms
Feedback is key to improvement. It helps understand what works and what doesn’t. Here’s why feedback matters:
Encourages communication: Opens up lines between workers and managers.
Identifies gaps: Shows where improvements are needed.
Drives change: Leads to better safety and efficiency.
There are many ways to collect feedback. Surveys, meetings, and suggestion boxes are common. Feedback should be welcomed, not feared. It’s a tool for growth. Acting on feedback can lead to big improvements in safety and operations.
Technology And Safety
The Safe Operating Area (SOA) is vital in technology and safety. It ensures systems work within their limits. This keeps both devices and users safe. We rely more on tech every day. So, understanding SOA helps us avoid risks. It’s about balance – between performance and protection.
Safety Apps
Many apps today can help keep you safe. They are easy to use. Some can even save lives. Let’s talk about a few:
Emergency services apps – They send your location to help fast.
Personal safety apps – These can alert friends if you’re in danger.
These apps are tools. They work best when you know how to use them. You should learn about them before an emergency happens. This way, you can act fast if needed. Safety is a big deal. Apps are just one way to stay safe.
Real-time Monitoring
Real-time monitoring is watching things as they happen. It’s used in many areas. For example, in factories, on roads, and in hospitals. This helps spot problems early. Quick action can then be taken.
Think of a traffic app. It shows where there are jams. This helps you pick a better route. Hospitals use monitors to keep an eye on patients. If someone needs help, staff know right away.
Being able to see what’s happening right now is powerful. It can keep us out of trouble. It can also help us make smarter choices.
Credit: techweb.rohm.com
Case Studies
The Safe Operating Area (SOA) is crucial for electronic devices. It defines the limits for reliable operation. Staying within these limits prevents damage. Case studies often showcase SOA importance.
Successful Implementations
Many industries have seen benefits from respecting SOA. Robust electronics in aerospace is a prime example. Here, adherence to SOA means enhanced safety and reliability. There are instances where SOA has made a clear difference:
Power supply units maintained efficiency under stress.
Automotive electronics withstood high temperatures.
Medical devices operated consistently over long periods.
Each case shows the SOA’s value. Factories also report fewer breakdowns. This is due to following SOA guidelines.
Lessons Learned
Studying SOA implementations teaches us much. First lesson: know your limits. Pushing components too hard leads to failure. Another lesson is the value of regular monitoring. This catches issues before they escalate.
Education is also key. Teams trained in SOA can prevent costly mistakes. Finally, quality control is vital. It ensures every part meets SOA standards. These lessons help create a culture of safety and reliability.
Frequently Asked Questions
What Is The Safe Operating Area Of A Transistor?
The safe operating area (SOA) of a transistor defines the limits of its voltage, current, and power to avoid damage during operation. It ensures reliable performance without risk of failure.
What Is The Safe Operating Area Of A Mosfet?
The safe operating area (SOA) of a MOSFET defines its maximum power handling capability without damage. It outlines allowable combinations of voltage, current, and temperature for reliable operation. This ensures the MOSFET operates within its specified limits, preventing failure due to overheating or excessive stress.
What Is The Safe Operating Area Protection?
Safe operating area protection safeguards power transistors by restricting operational conditions to prevent damage from factors like excessive voltage, current, and power. It ensures reliable and long-lasting component performance.
What Is The Safe Operating Area Test?
The safe operating area test assesses a semiconductor device’s power and voltage limits to prevent damage during operation. It ensures reliable performance within specified boundaries.
Conclusion
Understanding the Safe Operating Area (SOA) is crucial for device longevity. It ensures that electronic components work within their limits. Staying within these boundaries prevents damage and extends the life of your equipment. Remember, knowledge of SOA equals care for your devices.
Always refer to the manufacturer’s guidelines. Keep devices running smoothly. Protect investments by operating smartly. Safety first, always.
Ever scrolled through your social media feed and seen a “Marked Safe” meme? These viral bits of humor have taken the internet by storm.
A Marked Safe Meme Generator lets anyone jump into this trend with ease. You can craft your own witty take on everyday victories or global events. It’s a simple tool for a quick laugh or social commentary. The best part is you don’t need to be a pro at graphic design.
A few clicks and you’re the creator of a meme that might just light up the internet. Whether it’s surviving a coffee shortage or a hectic Monday, these memes resonate with millions daily. The generator is your ticket to joining the fun without any hassle. So, let’s dive into how this tool can turn your thoughts into viral sensations.
Credit: imgflip.com
What Is A Marked Safe Meme?
The Marked Safe Meme Generator creates images that show relief after events. People use these to share funny or light-hearted experiences. The ‘Marked Safe’ meme lets users joke about situations where there’s no real danger. It’s widely recognized on social media platforms.
Origin And Evolution
Internet memes often start from a single image or idea that quickly spreads. The ‘Marked Safe’ meme is no different. It began on Facebook. The site would let users mark themselves safe during disasters. This feature aimed to give friends and family peace of mind. Yet, people started using this seriously intended tool in a humorous way. They made their own ‘Marked Safe’ images for everyday ‘disasters.’ Like spilling coffee or missing a bus. Over time, the meme evolved. Now, it includes a wide range of events, both big and small. Meme generators popped up to make creating these images easy. Anyone can choose a background, add text, and share their meme online.
Cultural Impact
Memes are a big part of online culture. They let people bond over common experiences. The ‘Marked Safe’ meme is no exception. It brings humor to daily life. When people share these memes, they connect with others who find the same situations funny. This meme is a way to make light of minor troubles. It shows how we cope with life’s small challenges through laughter. As this meme spread, it became a part of how we communicate. It is a simple, relatable way to say, “I’ve been there too.”
How To Create Your Own Meme
The internet is full of memes, and now you can make your own. The Marked Safe Meme Generator lets you create memes easily. Memes are a fun way to share jokes and ideas. With the right tools, making your own meme is simple. This guide will help you start your meme-making journey.
Choosing A Template
Finding the perfect template is key for your meme. Think about the joke or message you want to share. Look for images that match your idea. Many websites offer meme templates. Some are classic memes you’ve seen before. Others might be new and fresh. Pick a template that suits your meme’s vibe. Some tips for picking a template:
Know your meme: Is it for laughs or making a point?
Search for trends: What’s popular can make your meme spread.
Keep it simple: A clear image works best for adding text.
Templates come in different styles. Some have one picture. Others might have two for comparison. Choose one that lets you say what you want.
Adding Text
Text makes your meme shareable. Keep it short and punchy. Big, bold fonts work well. Make sure it’s easy to read. Place text at the top or bottom of the image. Sometimes both. Here’s how to add text to your meme:
Be concise: Use few words for a strong impact.
Font choice: Pick a font that stands out on your image.
Color matters: Use colors that contrast with the background.
Remember, the text is the voice of your meme. It should match the tone of your image. Play around with the text size and position. This can change how people see your meme. Make a few versions. Ask friends which one they like best. This way, you can make the funniest or most relatable meme.
Popular Meme Generators
The Marked Safe Meme Generator is a fun way to create memes. People love sharing these memes on social media. They use pictures and texts to make jokes. Popular meme generators help them do this easily.
Top Online Tools
Finding the best tools online is simple. Many websites let you make memes fast. You just pick a picture, add text, and it’s ready. Some top sites include:
Imgflip: Very easy to use. Lots of pictures.
Meme Generator: Big collection of meme templates.
Canva: Great for adding your own style.
These sites have simple steps. First, choose a picture. Then, write your joke. Finally, share it with friends. No need to sign up on some. This makes it quicker to start.
Mobile Apps
Many prefer using their phones to make memes. Apps make this easy. You can make memes anywhere, anytime. Popular apps include:
App Name
Features
Mematic
Simple to use. Fast meme creation.
GATM Meme Generator
Lots of free templates. Custom memes.
Imgur
Share memes with a big community.
With these apps, you pick a template. Then, you add your text. You can also use your own photos. Sharing with friends is just a tap away.
Creative Uses Of The Meme
The ‘Marked Safe Meme Generator’ is a tool that lets users create their own customized memes. These memes often show relief after surviving humorous or exaggerated situations. They’ve become a popular way to share experiences online. This tool offers a fun twist on internet culture, allowing for unique expressions of both personal and social commentary.
Personalization
Memes are a core part of online communication today. The ‘Marked Safe’ format is no different. It lets people tailor their content to reflect their lives. You can announce your survival from everyday ‘disasters.’ Like spilling coffee or missing a bus. Users love to share these memes with friends. They are easy to make and even easier to share on social media.
Express individual experiences: Show your friends what you’ve ‘survived.’
Connect with others: Find common ground through shared ‘struggles.’
Be creative: Use humor to turn daily mishaps into something fun.
Social Commentary
‘Marked Safe’ memes can say a lot about society. They often highlight issues we face. Or even poke fun at events in the news. They can be a light-hearted way to deal with serious topics. Or just a method to spread laughs. These memes help us talk about what’s happening in the world. They do so in a way that’s easy to understand and often brings a smile.
Discuss current events: Share your take on news in a humorous way.
Shine a light on issues: Use memes to highlight important social topics.
Spread awareness with humor: Encourage others to learn through comedy.
Memes And Social Media
Everyone loves a good laugh. Memes do that on social media. They’re pictures, videos, or text that are edited to be funny. People share them online. They can spread quickly. Memes can be about anything. Some are about being ‘marked safe’ from events. It’s a joke about Facebook’s safety check. Now, there’s a tool to make these memes. It’s called the ‘Marked Safe Meme Generator’. This tool lets you create your own. You pick the event and customize the text. Then you can share it with friends. It’s easy and fun. Let’s explore how and where you can share these memes.
Platforms For Sharing
Memes have become a staple of online culture. They spread joy and commentary on everyday life. Many websites let you share memes. Here are some popular ones:
Facebook: Great for friends and family. Groups and pages are good for memes.
Twitter: Quick and easy. Use it to join trending topics. Hashtags are key.
Instagram: Visual platform. Perfect for meme images and short videos.
Reddit: Many communities for different interests. Share and rate memes.
These platforms have millions of users. They are perfect for sharing memes. They are also easy to use. You can reach a wide audience with your ‘marked safe’ meme. You might even go viral!
Viral Trends
Memes can catch on fast. When they do, we call them ‘viral’. Viral trends are big online. They can be dances, jokes, or challenges. Memes are often part of these trends. A ‘marked safe’ meme might become part of a viral trend. If many people share it, it could be everywhere. You might see it on different websites. People might talk about it. The news might even cover it. Going viral can happen fast. It can be unexpected. It’s what makes memes exciting.
Remember to be kind online. Share memes that make people smile. Stay away from memes that might hurt someone. Always think before you share. Now go have fun with your ‘marked safe’ meme!
Credit: imgflip.com
Legal Considerations
The Marked Safe Meme Generator lets users create fun memes easily. But, it’s important to know about the legal side. This includes copyright rules and what’s called fair use.
Copyright Issues
Creating memes with the Marked Safe Meme Generator is popular. Yet, copyright rules are crucial. These rules protect the original work of others. For example, images and texts. When making memes, you must be sure not to use someone else’s work without permission. This could lead to legal problems. Here are some key points:
Always check if you can use the image or text.
Getting permission from the owner is a safe step.
Creating original content is the best way to avoid issues.
Sometimes, you might find images labeled for reuse. These are safer to use. But, still check the rules attached to them.
Fair Use
The concept of fair use can be a bit tricky. It allows the use of copyrighted material under certain conditions. This includes uses like criticism, news reporting, teaching, and research. But, making memes might not always fall under these categories. Here’s what you should know:
Not all meme-making can be seen as fair use.
Using small parts of a work might be safer.
Educational or non-profit uses often have more freedom.
Even with fair use, it’s good to be cautious. If unsure, seeking advice from a legal expert can help. They can guide you on what’s safe to use and what’s not.
Meme Etiquette
Creating memes can be a fun way to express thoughts. The ‘Marked Safe’ meme is popular online. It shows relief from various situations. Users should make memes responsibly. This means understanding the impact they might have. So, let’s talk about how to create these memes without hurting others.
Respecting Sensitivity
Memes often reflect real-life events. Some of these events can be sensitive topics. People may feel strong emotions about them. It’s important to be careful. Think about the feelings of others who see your meme. Not all topics are suitable for humor. Some tips to keep in mind:
Know the context of the event you’re referencing.
Avoid making light of serious situations.
Consider the impact on affected individuals.
Imagine how you would feel in their place. Memes should bring joy, not hurt. Always choose kindness over a quick laugh.
Avoiding Offense
Humor is subjective. What’s funny to some may upset others. Your goal is to entertain, not offend. Here are some tips to avoid crossing the line:
Steer clear of stereotypes or generalizations.
Respect cultural and personal boundaries.
Don’t target specific individuals or groups.
Before sharing a meme, ask yourself a simple question. Could this harm someone? If the answer might be yes, don’t share it. It’s better to be safe than sorry. Let’s create a positive space online with our humor.
Future Of Memes
Memes have become a staple in online communication, often encapsulating feelings and events with humor. The Marked Safe Meme Generator taps into this trend, allowing users to create memes that depict relief after various situations. These tools reflect the evolving nature of memes, which continue to shape how we connect online.
Trends To Watch
With memes, change is the only constant. Users love fresh content that speaks to the here and now. Memes today are not just for laughs. They reflect current events and social moods. The Marked Safe Meme Generator is an example of this. It lets people express feelings about events in a lighthearted way. Look out for these trends:
Personalization: People want to make memes that feel like their own.
Speed: Quick meme creation is key. No one wants to wait.
Shareability: Easy sharing options are a must for any meme tool.
Memes will keep mirroring our world. They will stay easy to make and share. This will keep them central in online talk.
Potential Developments
As meme culture grows, so do the tools we use. The Marked Safe Meme Generator will likely evolve. Expect to see features like:
Smart Suggestions: The tool may offer ideas based on trends.
Collaboration: Users might soon make memes with friends online.
Integration: The generator could work directly within social media apps.
These changes will make meme-making even more of a social activity. They will help people stay connected and have fun together.
Credit: www.kapwing.com
Frequently Asked Questions
How To Create Your Own Marked Safe On Facebook?
To create a custom “marked safe” status on Facebook, go to the Crisis Response section, select the event you’re safe from, and share your status update.
What Is The Marked Safe Symbol?
The marked safe symbol indicates someone has reported themselves as safe during a crisis or emergency on social media platforms. It reassures friends and family about their well-being. This feature becomes active during significant natural or human-made disasters.
What’s The Best Free Meme Generator?
The best free meme generator is Imgflip’s Meme Generator, known for its vast template library and user-friendly interface.
What Does Marked As Safe Mean?
“Marked as safe” indicates an item, email, or website has been reviewed and deemed free from threats, such as viruses or malware. It generally signifies it’s secure to access or use.
Conclusion
Crafting your own “Marked Safe” memes is now a breeze with the right tools. Want to share a light-hearted moment? Try out a meme generator. You’ll add humor to your day and connect with friends online. With easy steps, your meme can go viral.
Share your experiences creatively and bring smiles all around. Start creating today and spread the laughter!
Did you know there will be over 75 billion connected devices by 2025? This shows how much smart home tech is changing our lives. It brings us convenience, efficiency, and security.
Devices like smart thermostats and security cameras are making a big difference. They change how we live every day.
In this article, I’ll share seven cool hacks for smart home tech and how smart home technology will change lives. These hacks show how automation makes life easier. They improve our lifestyle and safety.
Let’s see how we can make our homes smarter and more efficient. It’s all about meeting our needs.
Key Notes
Smart home technology is set to revolutionize convenience and efficiency.
Connected devices enhance home security significantly.
Automation streamlines daily activities and chores.
Cost savings and energy efficiency are key smart home tech benefits.
Innovative hacks make smart living accessible to everyone.
The Evolution of Smart Home Technology
The history of smart home tech shows a big change in how we live. At first, home automation needed big changes to our homes. But now, wireless tech has changed everything.
Oldly, setting up home automation was very expensive. But now, thanks to new tech, it’s easier and cheaper. Today, just a Wi-Fi connection lets devices talk to each other easily.
Looking at the timeline, we see big steps like smart speakers and connected lights. These changes help us do more things automatically. They make our homes better places to live. And the future looks even brighter.
What is Smart Home Technology?
Smart home technology is a big change in how we live at home. It lets us control many things from far away. This makes our homes work better for us.
It uses the Internet of Things (IoT) to talk to all our gadgets. This makes our homes work together smoothly.
There are many smart home device types that make our lives better. These devices help us save time, feel safe, and use less energy.
Smart speakers, like Amazon Echo and Google Home, help us control things with our voices.
Smart thermostats, like Nest, learn how we like our home to be warm or cool.
Connected security systems, like Ring and Arlo, keep an eye on our homes and send us alerts.
Smart lighting, like Philips Hue, lets us change the lights and set schedules from anywhere.
Learning about connected home systems helps us make smart choices. It shows us how these devices make our homes better places to live.
How Smart Home Technology Will Change Lives
Smart home devices have changed my daily tasks. They make my routine smoother and more efficient. I can manage my home easily with automation.
This saves time and boosts my productivity. Seeing the smart technology daily impact is key. It shows the big changes I see every day.
The impact of smart home devices on daily routines
Smart devices have made household chores easier. Smart thermostats adjust the temperature for me. This makes my home comfortable without me doing anything.
Lighting turns on and off at set times, fitting my schedule perfectly. Smart appliances like refrigerators remind me to buy groceries or even cook meals. This means I spend less time on boring tasks and more time enjoying life.
Improving lifestyle with smart home tech
Smart technology has improved my lifestyle a lot. It includes better security like smart cameras and energy-saving lights and appliances. These devices make my home safer and more energy-efficient.
I can check on my home from anywhere with remote access. This makes me feel safe even when I’m not there. Plus, saving energy means lower bills. I can use that money for fun things instead.
Benefits of Smart Home Technology
Smart home tech makes life better in many ways. It improves security and saves energy. It also makes daily tasks easier and cheaper.
Enhancing security at home
Smart home tech boosts home security. It includes smart locks and cameras. These let you watch your home from anywhere.
You get alerts when something strange happens. This helps keep your home safe. It also makes it easy to control who comes in.
Energy efficiency and cost savings
Smart homes use less energy. This saves money on bills. It also helps the planet.
Smart thermostats and energy monitors learn your habits. They use less energy when you’re not home. This saves money and is good for the environment.
Convenience and automation in daily tasks
Smart homes make life easier. They can turn lights on and off, control appliances, and even order groceries. This saves time and makes life simpler.
Using these smart tools lets you enjoy more free time. It makes daily tasks less of a hassle.
Smart Home Tech Trends to Watch
Home technology is changing fast. It brings new chances and challenges. Artificial intelligence is making smart home devices smarter.
AI makes our daily lives easier. It makes devices work better together. This is changing how we live.
Health monitoring systems are becoming common. They track our health in real time. This helps families stay healthy and informed.
Home automation is moving towards health first. This is what many people want. It’s not just about being convenient.
People want to be kind to the planet too. Smart homes are now more eco-friendly. They help us use less energy and stay green.
Transforming Security: Smart Solutions
Exploring smart home tech, I see how it boosts home security. Smart devices have changed how we keep our homes safe. Smart doorbells and remote monitoring systems stand out.
Smart doorbells and their functionality
Smart doorbells from Ring and Nest let me see who’s at my door from anywhere. They have cameras and two-way audio for talking to visitors. This keeps me safe, even when I’m not home.
Getting alerts on my phone when someone comes to the door makes me feel secure. It helps keep intruders away and lets me check on visitors quickly.
Remote monitoring with smart cameras
Smart cameras have changed how I watch over my home. They let me see what’s happening in real-time. With motion detection and alerts, I stay alert to any odd activity.
Cloud storage for footage makes it easy to check past events. This adds more security. Smart doorbells and cameras make my home much safer.
Lighting Innovations That Make Life Easier
Lighting is key in today’s homes. It adds beauty and function. Smart lighting solutions bring ease and save energy, making homes better.
Learning about smart lighting changes how we live. It lets us customize and save energy.
Interactive lighting systems
Interactive lighting lets us change lights with a tap or voice. It’s great for any time, like parties or quiet nights. We can pick brightness and colors for the perfect mood.
Energy-saving smart bulbs
Choosing energy-efficient bulbs is smart. They use less power and have cool features. We can set them to turn on or off when we want.
This control saves energy and makes life better. Smart lighting is good for us and the planet.
Revolutionary Smart Appliances
Smart home appliances are changing how we live. They make everyday tasks easier. This is especially true in the kitchen and around the house.
How smart refrigerators simplify meal planning
Smart refrigerators are a big deal in kitchen tech. They keep track of what food I have. They even suggest recipes based on what I have.
This saves me a lot of time deciding what to cook. They also remind me when I need to buy more food. This makes planning meals easier and helps cut down on waste.
Convenience of robotic vacuum cleaners
Robotic vacuum cleaners are all about ease. They clean my floors on their own. This lets me do other things while they work.
I can set them to clean when I’m not home. This means my house stays clean without me having to do it. It saves me time and lets me relax in a clean home.
Entertaining and Multimedia Enhancements
Smart home entertainment systems have changed how we enjoy media at home. They include smart TVs and sound systems. These devices make our multimedia experiences better.
Home automation for entertainment lets me control everything with one device. I can stream movies, listen to music, or play games easily.
My smart audio system makes switching between services or adjusting the volume simple. I just use voice commands. This makes my home welcoming for guests.
These systems also let me customize settings to my liking. It makes watching or listening more fun. Technology makes our home time special and memorable.
Smart Home Heating and Cooling: The Future
Smart home heating and cooling are leading the way in new tech. They change how we control the climate in our homes. These changes make our homes more comfortable and save energy.
By using smart heating and cooling, our homes work better for us. We get a living space that’s just right, all the time.
Benefits of learning thermostats
Learning thermostats, like the Nest, change how we set the temperature. They learn our habits and adjust the heat or cold for us. This means our homes are perfect when we get back, and our bills are lower.
These thermostats make our homes comfortable without us doing much. They keep the perfect temperature, based on when we’re home.
Optimizing comfort with smart vents
Smart vents add more control by moving air around our homes. They send warm or cool air where it’s needed most. This means less energy waste and more comfort.
Learning thermostats and smart vents work together. They make our homes comfortable and smart. They fit our lives perfectly.
Gardening and Landscaping Hacks
Smart gardening tech makes outdoor care easier and greener. It solves common garden problems. Now, tasks like watering and mowing are simpler.
Smart irrigation systems for efficient watering
Smart irrigation systems change how I water my plants. They use weather data for the perfect amount of water. This keeps plants healthy and saves water.
Automated lawn maintenance solutions
Robotic mowers make lawn care easy. I just set a schedule and let them work. They keep my lawn neat without my help. This tech makes gardening easier.
Pet Care Innovations Through Smart Technology
Caring for my pets is easier now thanks to smart tech. Smart pet care devices have changed how I care for my pets. They help even when I’m busy.
Remote pet feeders for busy owners
Remote pet feeders are great for busy people like me. I can set meal times and sizes from my phone. This way, my pets eat well, even when I’m away.
Smart pet doors for convenience and safety
Smart pet doors make my pets safer and freer. They only let my pets in, keeping others out. It’s also nice that my pets can go outside when they want.
Automated Energy Management: Smart Savings
Smart homes use automated energy systems to save money. These systems help me use less energy and work better. I get real-time data from smart meters to change my habits.
These systems show me how much energy I use. I can find ways to use less. For example, turning off devices when not needed saves a lot of money.
Smart home solutions help me live green and save money. They make my home more eco-friendly and cut down on bills. Using these systems has changed how I live and save money.
Getting Started with Smart Home Technology
Starting with smart home tech can feel hard. It’s tough to pick the right devices for you. I suggest starting with devices that fit your lifestyle and budget.
This way, you can make your home smarter bit by bit. And you won’t spend too much money.
Choosing the right devices for your needs
First, figure out what devices you need for your daily life. Start with basics like smart light bulbs, plugs, and thermostats. These make life easier and save energy.
Choose devices that work well with what you already have. This includes things like Amazon Alexa or Google Assistant. It makes setting up your smart home easier.
DIY hacks for budget-friendly smart solutions
There are ways to make your smart home affordable. Try DIY projects like using timers for lights. Or build a home automation system with a Raspberry Pi.
These ideas let you customize your smart home without spending a lot. You can enjoy smart home perks without breaking the bank.
Future of Home Automation: What to Expect
The future of home automation is exciting and changing fast. New smart home technologies are coming. They will make our homes work together better.
AI smart home apps will change how we do daily tasks. They will make our lives easier and more efficient.
Emerging technologies and trends
In the next ten years, our homes will get smarter. We’ll see gadgets that fit right into our lives. Things like smart thermostats and security systems will get better.
These new techs will save energy and make our homes more comfy. They will make our lives better in many ways.
The role of AI in smart homes
AI is key in the future of smart homes. It uses data to guess what we want. This makes our homes easier to manage.
AI will make our homes adjust settings on their own. They will use less energy but still keep us comfy and safe. This will make our lives better.
Conclusion
Smart home technology has changed our lives in big ways. It makes our homes more convenient and safe. It also helps us save energy.
As we look ahead, smart tech will keep getting better. It will use artificial intelligence and automation more. This will make our homes even more efficient and tailored to us.
I think everyone should check out smart home systems. They make our lives easier and help the planet. The future of smart homes is exciting, and I’m happy to be a part of it.
FAQ
What is smart home technology?
Smart home tech makes your home devices work together. You can control things like lights and security from your phone. It uses the Internet of Things (IoT) for easy communication.
How can smart home technology improve my daily life?
Smart home devices make life easier. They automate tasks and save energy. This means you can enjoy your day more and feel safer.
What are the benefits of smart home devices?
Smart devices offer better security and energy use. They also make daily tasks easier. This includes things like ordering groceries and controlling your entertainment.
How do smart appliances make household management easier?
Smart appliances like smart fridges and vacuum cleaners help a lot. They take care of daily tasks. This gives you more time for fun.
What trends should I watch for in smart home technology?
Look out for AI in smart devices and health monitoring. Also, expect more focus on being green and sustainable.
How can I enhance the security of my home with smart technology?
Smart doorbells and cameras let you see who’s at the door from your phone. They offer alerts and video storage for extra security.
Are there energy-saving benefits of smart home systems?
Yes, smart systems track and save energy. This can cut down on your bills and help the planet.
How do I get started with smart home technology?
Start with easy-to-use devices like smart plugs and lights. Look into DIY hacks to save money and meet your needs.
What future developments can I expect in smart home technology?
Expect more AI and machine learning in smart homes. This will make your home even more automated and tailored to you.
What role does AI play in smart homes?
AI makes smart homes smarter. It predicts what you need, makes tasks easier, and boosts security. This creates a more intuitive home.